donderdag 23 december 2010

Merry Christmas !!!

Scroll down for the English version

Ik had gehoopt nog een extra artikel te kunnen publiceren, maar Kerst gaat in eerste instantie over familie en vrienden en die gaan voor.

In ieder geval wil ik jullie een gezellige Kerst een een heel voorspoedig nieuwjaar wensen.

Maar Kerst is ook het seizoen van de cadeaus.
Dus ook ik wil jullie een cadeautje geven.

Onder de kerstboom vindt je mijn cadeautje.


Beschrijving van het kerstcadeau.

Dit weblog bevat ondertussen al 100 artikelen. Ik kan me voorstellen dat het bijna ondoenlijk is om een bepaald verhaal of onderwerp dat je nu net nodig hebt terug te vinden.

Daarom heb ik een inhoudsopgave (index als je wil) van dit web-log gemaakt. Je vindt hier alle verhalen terug, gesorteerd op onderwerp en met een korte beschrijving erbij.

Deze index moet gaan uitgroeien tot een complete aparte site over wijnmaken. Maar dat is toekomstmuziek, en zeker iets voor de verre toekomst.

Voorlopig heb ik het zoeken op dit weblog een stuk makkelijker gemaakt.

De index vindt je hier:


Ik hoop volgend jaar weer minstens zoveel lezers als dit jaar te mogen begroeten.

Luc


I had hoped to publish an extra article before the end of the year. However the holliday season is for me in the first place the season where family and friends take first place.

Therefore let me end this year by whishing you and your loved ones a merry christmas and a very happy new year.

However, Christmas is also a time for sharing presents. So I want to give you one.

You will find my present under the christmas tree.


Description of the 2010 Christmas present.

This web-log now contains 100 stories. It is almost impossible to find a particular story or subject when you need it.

Therefore I made an index of this web-log.
The index sums all articles, sorted by subject, with a brief description.

I intend to expand this index to a complete winemaking site. That is however something for the (far away) future.

Till that time I made searching this web-log a hell lot easier.

You can find the index here:


I hope that next year at least as many readers will visit this web-log as did this year.

Luc

vrijdag 10 december 2010

Pulpgisten deel 1 /
Pulpfermenting part 1

Scroll down for the English version

Er bestaan veel misverstanden over pulp-fermenteren/pulp-gisten. Ook op wijnmakersforums lees je de meest wilde adviezen over pulpfermenteren.

Tijd om de boel eens op een rijtje te zetten. Wat verstaan we onder pulp-fermenteren. Hoe doe je het. Waarom zou je pulp-fermenteren en hoe lang moet je dat doen.

In dit verhaal staan nogal wat verwijzingen naar verhalen die al eerder op dit web-log zijn gepubliceerd. Je kunt de verwijzingen raadplegen door op de dikgedrukte woorden in dit verhaal te klikken.

Definitie:

Onder pulpfermenteren verstaan we het vergisten van bloemen of fruitpulp (bestaande uit vruchtvlees en eventueel schillen) samen met het sap, of aangevuld met water.

Pulpfermenteren noemen we in de volksmond ook wel pulp-gisten.

Anders gezegd.

We stampen of malen het fruit kapot, doen er al of niet water bij en laten de pulp samen met het zo ontstane sap een tijdlang gisten.

Hoe doe je dat precies.

Wel dat hangt natuurlijk van het soort ingredienten af die je tot wijn wil verwerken.

Appels en peren stampen we kapot, vriezen we in, of hakken we fijn in een keukenmachine.

Zacht fruit als bramen, vlierbessen, aardbeien, annanas etc kunnen we gemakkelijk met een aardappelpuree-stamper, kapot stampen. Ook voor deze vruchten geldt dat invriezen helpt bij het vrijmaken van het sap.

Fruit met een harde schil als Lychees, sinaasappels, mandarijnen, granaatappels pellen we eerst. We verwijderen de witte vliezen die een bittere smaak kunnen afgeven en stampen het vruchtvlees tot moes met een puree-stamper.
ook hier geldt weer dat het eerst invriezen van het vruchtvlees veel sap meteen doet vrijkomen.


Bloemen, zoals vlierbloesem, paardenbloemen of rozen, overgieten we met water en deze pulp laten we een paar dagen 'trekken'als thee.

Al deze methoden zijn hier op dit web-log al nader besproken.

Als we de pulp eenmaal gemaakt hebben dan kunnen we deze aan het gisten zetten.


Je kunt de pulp gewoon in het sap laten, maar je kunt de pulp ook in een nylonkous doen. De pulp blijft dan bij elkaar en de nylonkous is later gemakkelijk uit te persen.

Doe de pulp en het sap in een grote emmer of ton.
Dek dat vat met een doek af, en zet die doek vast met een elastiek.


Je zult zien dat de vruchten (of andere) pulp boven komt drijven in je vat. De pulp vormt een soort koek die op je sap drijft. Dit noemen we de hoed.

Vanaf dat moment tot het moment dat we de pulp van het sap scheiden zullen we de hoed elke dag meerdere keren onderdompelen in het sap en goed omroeren.

Je begrijpt nu waarom we pulpgisten in een groot vat. In een fles kun je de pulp niet onderduwen.
Verder kun je later ook niet makkelijk de pulp uit een fles krijgen.
De uitzondering hierop is bloemenpulp. Bloemen hoef je ook niet onder te duwen, als je fles niet te groot (tot 10 liter) is kun je hem makkelijk schudden.
Als de pulp in een vat zit dan kun je hem er makkelijk uitscheppen en zeven of persen.

Daarnaast zal de pulp flink uitzetten. En als dat in je fles gebeurt, of in een vat dat afgesloten is met een deksel en waterslot, dan kan de fles of dat vat verstopt raken met alle nare gevolgen van dien. De fles of het vat kunnen zelfs uit elkaar spatten door de druk die er ontstaat, met alle gevolgen van dien.

Waarom doe je het.

Bovengenoemde methoden kun je in alle wijnmaker boeken vinden, op vele forums en natuurlijk in de recepten op dit web-log.

De vraag is natuurlijk waarom je zou pulp-fermenten.


Bij bloemen is dat overduidelijk. Paardenbloemen, rozenblaadjes en vlierbloesem zijn droge bloemblaadjes. Die kun je niet vergisten.
We overgieten ze dus met water en laten ze als een soort thee een paar dagen trekken.
De smaak en kleurstoffen van de blaadjes trekken dan in het water, en zo ontstaat onze most.

Bij andere ingredienten is dit minder duidelijk maar werkt het hetzelfde.

Als je de vruchten tot moes zou stampen en meteen zou persen zou je natuurlijk een vruchtensap krijgen.

Maar er zouden veel smaak, kleur en geurstoffen verloren gaan. Veel stoffen zitten niet alleen in het sap van de vrucht maar ook in de schil of in het vruchtvlees.

Het beste bewijs hiervan is: wijn van druiven !!!
Witte wijn wordt meestal gemaakt van rode druiven. Als je de druiven perst krijg je een wit sap, als je de pulp een korte tijd in het sap laat zitten dan krijg je een rose. Laat je de pulp een paar dagenm (tot weken) in het sap weken dan krijg je een donker rode wijn.

Als we dus het sap meteen van het vruchtvlees scheiden gaan alle stoffen die in het vruchtvlees zitten verloren.

Als we dan, zoals bij sommige recepten nodig is, ook nog water toevoegen dan verdunnen we het sap ook nog eens. Waardoor we een ´te slappe´ wijn kunnen krijgen.

Daarom laten we onze most dus eerst een paar dagen pulpfermenteren.

Maar er is meer aan de hand.

Alcohol !!!!

Als we onze vruchten of bloemen vergisten dan zit de pulp in eerste instantie in het sap van de vrucht, sap aangelengd met water of alleen in het water.

Sommige stoffen zullen in het sap of water oplossen. Bepaalde kleurstoffen, smaakstoffen, zuren en suikers zullen dat zeker doen. Maar tannine bijvoorbeeld lost niet in water op !!!

Als we pulpfermenteren dan zal er ook al langzaamaan alcohol gevormd worden.

En bepaalde kleurstoffen en smaakstoffen die niet in water oplossen lossen wel in alcohol op.

Dus door het pulpfermenteren zullen er meer smaakstoffen in je wijn terechtkomen. En dat is wat we natuurlijk willen !!!!

Pecto enzymen !!!

We kennen allemaal het verhaal dat pecto enzymen de celwanden van vruchten afbreekt waardoor er meer sap vrijkomt. Dat heb ik duidelijk in het eerste verhaal over pecto enzymen laten zien.

We weten ook dat pecto/enzymen niet werken in een omgeving waar gist aan het werk is.
Dat heb ik duidelijk laten zien in mijn tweede verhaal over pecto enzymen.

Met andere woorden we moeten dus een strikte volgorde aanhouden bij het pulp-fermenteren.

De juiste volgorde.

Dag 1

1) begin met het maken van je pulp op een van bovenstaand besproken methodes.

2) doe de pulp in een open vat, afgedekt met een doek die wordt vastgezet met een elastiek.

3) doe de pecto enzymen bij de pulp en roer deze goed door de pulp heen. Doe dat natuurlijk pas als de pulp minstens op kamertemperatuur is.

4) roer de pulp nu een paar keer per dag goed door. Op deze manier zullen de pecto enzymen hun werk goed kunnen doen.

Dag 2

1) De pecto enzymen zullen hun werk gedaan hebben en de pulp zal voor een deel door de enzymen zijn afgebroken. Daardoor zal er al meer sap zijn vrijgekomen.
Veel smaak en kleurstoffen uit de pulp zullen al in het sap zijn opgelost.

1) Meet het SG en de zuurgraad van je pulp. Pas je zuurgraad en suikergehalte aan op de gemeten waarden.

2) Voeg nu je giststarter aan de pulp toe.

3) roer de pulp een paar keer per dag goed door. Op deze manier breng je zuurstof in de most waardoor je gistkolonie nog beter zal gedijen.

Dag 3 en verder.

Door het gisten ontstaat er CO2 gas. Dit gas zal ervoor zorgen dat de pulp boven op het sap komen te drijven en zo de 'hoed' vormt.

Deze hoed roeren we enkele keren per dag door de pulp. Op deze manier voorkomen we dat er bacterie-culturen op de hoed kunnen ontstaan.

Maar we zorgen er zo ook voor dat de pulp goed in aanraking met de most komt zodat we zeker weten dat alle smaak en kleurstoffen goed in het sap oplossen.
Ook de nu al ontstane alcohol zal ervoor zorgen dat er meer smaakstoffen in de most terechtkomen zoals bijvoorbeeld tannines.
Als laatste zorgen we er ook voor dat de gistcellen goed bij de pulp komen waardoor de pulp nog verder wordt afgebroken en waardoor er nog meer sap zal vrijkomen.

Een paar dagen later.

Na een paar dagen zeven we de pulp uit het sap en persen de pulp eventueel uit.

Het sap brengen we over naar een gistingsfles. Deze fles luiten we af met een rubber dop en een waterslot.

Hoe lang moet je pulpgisten ???

Hier komen we op een moeilijk terrein.

Dit is het punt waar de echte wijnmaker de wetenschap van het wijnmaken inruilt voor de kunst van het wijnmaken. Hier begint het echte wijnmaken pas !!!!

Er zijn wijnmakers die hun pulp een paar dagen in de most laten weken alvorens de giststarter erbij wordt gevoegd. Het sap wordt gekoeld zodat activiteiten van bacterien en wilde gisten onderdrukt worden. De koeling zorgt er dan voor dat het sap niet kan bederven. Dit heet koude maceratie.
Hoe lang je dat doet hangt van de ervaring van de wijnmaker af.

Maar meestal laat je de pulp niet langer als 1 dag in het sap of water of sap met water weken. Dan voeg je suiker, zuur en de giststarter toe.

Vlierbessen bevatten heel veel tannine. Als je deze bessen langer als 4-5 dagen laat pulpgisten dan zullen er zo veel tannine's in je wijn vrijkomen dat de wijn erg lang moet rijpen voordat hij drinkbaar is.

Er zijn ook vruchten waar dat niet het geval is.

Er zijn wijnmakers die hun (druiven) wijn zo lang laten pulpfermenteren totdat de hoed (de pulpmassa) niet meer komt bovendrijven.

Op het moment dat de gisting stopt wordt er geen koolzuurgas meer gevormt. Daardoor zal de pulp niet meer boven komen drijven en zakt de hoed dus naar de bodem van je vat.
Er zijn wijnmakers die dat moment kiezen als het moment om de pulp uit te persen en het sap naar de gistingsfles over te brengen.

Er zijn ook wijnmakers die dan nog een aantal dagen tot zelfs weken of maanden de pulp in de most laten meegisten. Dat noemen we verlengde maceratie.

Meestal zullen hobby wijnmakers niet langer als 4 tot 5 dagen laten pulpgisten.

Tot zover de theorie.

We hebben nu het hoe en waarom van het pulpgisten in theorie besproken.

Maar de praktijk ??? Klopt dit allemaal wel.

Even terug naar de basis.

We laten de pulp een aantal dagen in het sap 'trekken' om zo waardevolle stoffen uit de pulp te halen. En dat wilde ik wel eens controleren.

In de komende afleveringen zal ik laten zien wat koude maceratie en pulpgisting met een sap doet.

Ik doe proeven met appels, bramen, pruimen en vlierbessen. Ik laat zien hoe het sap zich onder bepaalde omstandigheden ontwikkeld als de pulp in het sap blijft.

Blijf dit web-log dus volgen.

Verwijzingen in dit weblog.
- Appels verwerken door te bevriezen
- Appels verwerken met een keukenmachine
- Vlierbloesemwijn
- Rozenblaadjeswijn
- Paardenbloemenwijn
- Het belang van pecto enzymen
- Avonturen op het pectopad deel 2
- Hoe maak je een giststarter


Luc Volders

Copyright 2010
Geen deel van deze publicatie mag worden overgenomen
in welke vorm dan ook (web-pagina's, forums of gedrukte tekst)
zonder uitdrukkelijke schriftelijke toestemming van de
auteur.


There are many misunderstandings about pulp-fermenting. Even on many winemakers forums you will read the most absurd advises about pulp-fermenting.

So time to put things straight. What do we call pulp-fermenting. How is it done. Why should you pulp-ferment and how long. All questions I will try to answer in this and the upcoming stories.

In this story there are many links to stories that have previously been published on this web-log. You can re-read those stories by clicking on the fat printed text in this story.

Definition.

Pulp-fermenting means fermentation of flowers or fruit-flesh together with the juice, or with added water.

Saying things differently.

We mash the fruit, do or do not add water and let the pulp together with the so made juice ferment for a certain time.

How it is done.

This depends on the kind of ingredients you want make wine from.

Apples and pears can be mashed, frozen or crushed in a kitchen machine.

Soft fruit like blackberries, elderberries, strawberries, pineapple etc. can be mashed with a potato masher. Freezing these fruits, before mashing, will help releasing the juice.

Fruit that is contained in a hard peel like lychees, oranges, mandarine or pommegranate have to be peeled first. Next the white fleece has to be removed because that can give a bitter taste to your wine.
The fruit can then be frozen and thawed and mashed or just mashed. Again freezing helps releasing more juice.


Flowers like elderflowers, rosepetals and dandelions will be covered with water. The flowers will be soaked in the water like tea for a few days.

All these methods have been discussed in previous stories on this web-log.

Now when we have prepared the pulp we can let it ferment.


You can leave the fruitpulp or flowers in the juice. However it is more convenient to put the pulp into nylon stockings. The pulp is that way easily collected and pressed in a laterv stage.

Put the pulp together with the juice in a large primary or bucket, covered with a cloth or kitchentable. Fasten the cloth with a rubber band.


In a short time you will notice that the pulp will start to flow on top of the juice. The pulp starts to stick together like some kind of cake. We winemakers call this the cap.

From this moment on you will push the cap down into the juice several times a day. Stirr the mixture well.

This makes it clear why you should pulp-ferment in a large vessel. In a bottle there is no way you can push down and mix the cap in.
Next to that it is a hell of a job to get the pulp out of a bottle.
The exception is pulp from flowers. This is relatively easy shaken out of a bottle. And a secondary with flowers pulpfermenting can easily, if it is not to large say no more as 3 gallon, be shaken to mix the pulp in.
So when you ferment in a vessel with a large opening it will also be much easier to remove the pulp when the time has come to do that.

Besides this, the pulp will expand (swell). If that happens in a bottle, or primary that has been closed with a lid and an airlock the opening can get clogged. When pressure due to fermentation gets higher the CO2 gas that emerges can not escape due to the clogged airlock. The results can be devastating. A glass bottle may even explode in the end. Or the bung might be blown out and and enormous mess will be created (been there, done that).

Why do we pulp-ferment

The method mentioned above can be flound in all winemaking books, winemaking forums and of course on this web-log.

But why would you do this.


Well, when making a flower-wine this is obvious. Dandelion, rose-petals and elderflowers are all dry leaves. You can not ferment dry materials.
So we cover them with water and let it soak (like tea) for a few days.
The flavor and colour of the leaves will dissolve in the water, and that way our must arises.

When using other ingredients like fruit this is less obvious, but it works the same way.

If you would just mash the fruit and press it you would get fruit juice.
However a lot of flavor, colour and fragrances would be lost.
Many of these are not found in the juice of the fruit but also in the fruitflesh.

The best example of this is that white grape-wines are mostly made of dark grapes. When pressed the juice is clear. When the pulp is soaked shortly in the pulp you will get a blush wine, and when the pulp is soaked in the juice for several days you will get a dark red wine.

So when we immediately seperate the pulp from the juice valuable materials contained in the fruitflesh will get lost.

And when we, on top of that, add water to the juice, the juice even will be dilluted. This may cause a weak wine in flavor and mouthfeel.

That is why we let the wine ferment on the pulp for a few days.

But there is more.

Alcohol !!!!

When we ferment flowers or fruit, the pulp is in the fruitjuice, juice dilluted with water or just water.

Some components in the pulp will dissolve in this juice or water. Some parts that produce colour, flavor, acid and sugars will certainly do. Others will not. Tannin for example will not dissolve in water.

Now when fermentation has started, alcohol is made.

And there are valuable components that only dissolve in alcohol. Certain colour and flavor components that do not dissolve in water will dissolve in alcohol.

So by pulp fermenting more colour and flavor will get into your wine. And that is exactly what we are looking for.

Pectic enzyme !!!

We all know the story that tells that pecto enzymes will break down cells which releases more juice. I have clearly shown this in my first story on pectic enzyme.

We also know that pectic enzymes will not function in an environment where yeast is.
I demonstrated that in my second story about pectic enzymes.

So we need to follow a strict order in adding ingredients when pulp fermenting. I'll give to the order here.

Day 1

1) first make the pulp using one of the methods described above.

2) Put the pulp in a large vessel, covered with a cloth fastened with a rubber band.

3) Add the pectic enzymes to the pulp and stir it well in. Do this of course when the pulp (if needed) has cooled down or warmed up to room temperature.

4) Stir the pulp a few times during the first day. This helps pectic enzymes do their job.

Day 2

1) The pectic enzymes will have done their job and the pulp will have partly been broken down by the enzymes. This will have released some more juice.
Many colour and flavor parts will have dissolved in the juice.

2) Now add your yeast starter.

3) Stir the pulp a few times this day. This will bring some oxygen into the juice which helps your yeast colony growing further.

Day 3 and on.

Because the must is now fermenting vigorously CO2 will be formed in masse. This gas makes the pulp float on top of the juice and so forms the cap.

This cap should be mixed into the juice several times a day. This ensures that no bacteria-kolonies will emerge on the cap.

This also ensures that the pulp is well in contact with the juice which makes sure that all flavor and color components will be dissolved into the juice.
The alcohol that is forming will also make sure that more flavor and color components get into the juice. The alcohol will also dissolve tannin into the juice.

And last but not least stirring the pulp into the juice will also make sure that yeast cells can reach the pulp which helps in further breaking down the pulp and even releasing more components.

A few days later.

After a few days we will sieve the pulp out of the juice and press the pulp to get all the juice out.

The juice is then transferred to a secondary (carboy) which will be closed with a rubber bung with an airlock.

How long should you pulp-ferment ????

This is the point where the true winemaker trades science in for art. Here starts the real winemaking !!!

There are winemakers that let the pulp soak a few days in the juice before the yeast starter is added. The juice is cooled at that time so no activity of wild yeast or bacteria can start. This cooling makes sure the must can not spoil.
We call this cold-soak or cold maceration.
How long you will maintain this process depends on the experience of the winemaker.

Most of the times you will no longer as 1 day soak thye pulp in the juice before adding the yeast starter. The next day you measure the juice and add sugar, acid and the yeaststarter.

Elderberries contain a lot of tannin. If you pulpferment these berries for more as 4-5 days there will be so much tannin released that the finished wine will have to age a long time before it can be consumed.

There is off course fruit where this is not the case (think banana's for example).

There are also winemakers that let their (grape) wine ferment until the cap sinks to the bottom of the primary.

At the moment fermentation stops no more CO2 is formed. Therfore the cap will not float anymore and sink to the bottom of the primary. There are winemakers that choose that moment to press the pulp and transfer to a secondary.

There are other winemakers that leave the pulp in the must even after fermentation has stopped. They leave the pulp in for days, weeks and even months. All depending on what the winemaker things is best for that particular wine.
This is called extended maceration.

However most winemakers will not pulpferment for more as 4 to 5 days.

So far for the theory.

Up to now we have discussed the how and why of pulpfermenting in theory.

But how about reality, is this all true ????

Back to the basics.

We let the pulp ferment for a few days in the juice or in water to extract as much valuable components as possible. And that is what I wanted to check.

In the next few articles I will show you what cold maceration does to a juice.

I will show you experiments with apples, blackberries, plums and elderberries. You will see how the juice devellops under certain circumstances if the pulp stays in the juice.

So keep reading this web-log.


Verwijzingen in dit weblog.
- Processing apples by freezing
- Processing apples in akitchen machine
- Elderflower wine
- Rosepetal wine
- Dandelion wine
- The importance of pectic enzymes
- Adventures on the pectic path part 2
- How to make a yeast starter


Luc Volders

Copyright 2010
No part of this publication and pictures may be reproduced
in any form (printed text, web-pages, weblogs or forums)
without written permission of the author.

donderdag 25 november 2010

Roodfruit sap / Wine from red fruit juice

Scroll down for the English version

Toen ik op bezoek was bij mijn schoonmoeder zette ze mij een glas vruchtensap voor. Vruchtensap: omdat ze weet dat ik geen druppel alcohol drink als ik moet autorijden. En het sap was heerlijk. Ze had het bij de Aldi gekocht. Het sap van van Aldi's huismerk: Goldhorn en droeg het opschrift Roodfruit. Volgens de verpakking sap van appels, druiven en rode bessen.

Het sap was lekker, fris en vol van smaak. Natuurlijk kwam toen meteen de gedachte op om er dan ook maar wijn van te maken. Als een sap lekker is, dan zal de wijn die ervan gemaakt wordt meestal ook goed smaken.

Zoals alle sappen bij de Aldi kosten ook deze pakken niet veel. Maar aangezien je nooit zeker weet hoe een wijn uitpakt nesloot ik rustig aan te doen en er slechts 5 liter van te maken.


Zo gezegd, zo gedaan. Snel 6 pakken sap gekocht. Om de wijn te maken heb je maar 5 pakken nodig, maar ik speel meestal op safe, en koop dus liever een pak te veel als een pak te weinig.

Eerst maar eens de verpakking bestudeerd.


De fabrikant geeft aan dat elke 100ml sap 12,4 gram suiker bevat.
Dat is dus 124 gram suiker per liter.

Dat gaan we dan maar eens controleren.


De hydrometer geeft een SG aan van 54.


De Refractometer ook.

De twee meters zijn het dus met elkaar eens. Eens kijken wat mijn eigen SG tabel ervan zegt. Als je met mijn tabel wil werken en die niet hebt kun je hem downloaden door hier te klikken.


Wel zoals jullie weten geeft mijn eigen SG tabel het SG aan afhankelijk van de zuurgraad van het sap. We moeten dus eerst de zuurgraad achterhalen. De zuurmeting doen we, zoals altijd, door middel van titratie.

Als je de basiskennis over zuurmeting nog eens wil nalezen dan kan dat door hier te klikken.


Het roodfruitsap is een mooi donker sap. De zuurgraad door middeel van de basistechniek meten zal dus bijna niet gaan. We gebruiken daarvoor de 'witte-tegel methode'.
Als je niet precies weet hoe deze methode werkt dan kun je het verhaal hierover hier nalezen.


Aangezien zuurmeting een van de basistechniken van het wijnmaken is, raad ik je aan alle delen over het zuurmeten eens goed na te lezen. In deel 5 (de witte-tegel methode) vindt je verwijzingen naar de andere delen.

Goed terug naar de testen.


Zoals je ziet was het sap bij het meetpunt 4 nog rood, bij 5 werd het al aardig donker. Bij meetpunt 6 had het blauwloog de kleur doen omslaan.


We hebben dus een sap met een zuurgraad van 6.

Nu kunnen we mijn tabel raadplegen.


In mijn tabel vindt je bij een SG van 1055 met een zuurgraad van 6 dat er 123 gram suiker per liter aanwezig is.
Mijn tabel wijkt dus niet erg af van wat de fabrikant opgeeft. En daar kunnen we dus vanuitgaan: 124 gram suiker per liter.

Ik wilde van dit sap een wijn maken met 12% alcohol. Naar mijn idee was het sap genoeg vol van smaak om een dergelijk percentage te kunnen dragen.

De suikerberekening.

Om 1% alcohol te krijgen in 1 liter sap heb je 18 gram suiker nodig.

Ik wilde 12% alcohol in 5 liter sap.
Daar heb je dus in totaal voor nodig:
12% x 5 liter x 18 gram = 1080 gram suiker.

Het sap zelf bevat 124 gram suiker per liter. In 5 liter zit dus al 5 x 124 gram = 620 gram.

Om de 12% alcohol te kunnen krijgen moest ik dus nog 1080 (nodig) - 620 (aanwezig) = 460 gram suiker toevoegen.

Genoeg theorie we gaan wijn maken !!!!!

Dag 1

Ik begon met het maken van een giststarter. Deze zorgt ervoor dat er een gezonde, goed gistende kolonie gistcellen aan de most wordt toegevoegd.
Als je wil weten hoe je een giststarter kunt maken dan kun je dat nalezen door hier te klikken.


In dit geval verving ik het appelsap in het recept voor de giststarter door 1 liter van het Roodfruit sap. Dat had 2 voordelen.

- In de eerste plaats zal de most niet verdunt worden met appelsap, maar zal de totale uiteindelijke most uit Roodfruitsap bestaan.
- In de tweede plaats wist ik daardoor ook zeker dat het sap geen conserveermiddelen bevatte die niet op de verpakking vermeldt waren. Als de starter immers goed wilde gisten dan zal de complete most dat ook doen.

Dag 2

De giststarter stond inderdaad fel te gisten. We kunnen door met de volgende stappen.

Weer nam ik 1 liter sap en goot die in een pan. De pan zette ik op het vuur en al roerend deed ik er 360 gram suiker bij.

Waarom 360 gram ???
Wel ik moest nog 460 gram suiker in totaal toevoegen. Ik had al 100 gram bij de giststarter gedaan en moest dus nog........ inderdaad 360 gram toevoegen.

Toen de suiker was opgelost zette ik het vuur uit, en al roerend loste ik 5 gram gistvoeding aan het sap toe. Daarna liet ik dit mengsel afkoelen.

Ik nam een 5 liter gistingsfles en deed daar 2 pakken Roodfruitsap van 1 liter in. Daarna deed ik er het sap waarin de suiker en het voedingszuur was opgelost bij, en als laatste ging er de giststarter bij.

Er zat nu 4 liter sap in de fles, er was dus wat ruimte over voor als het sap ging schuimen. Ik verwachtte dat niet omdat mijn giststarter ook niet veel schuimde, maar je weet maar nooit.

Dag 4

De most stond flink te gisten, maar schuimde inderdaad niet erg. Ik vulde de fles daarom tot de rand aan met de laatste liter van het sap.

Na 2 weken.

Het sap was uitgegist en begon al aardig te klaren.

Na 2 maanden.

De wijn was helemaal helder geworden. Tijd om te bottelen !!!!


Het was een lichte lekkere tafelwijn geworden. Een echte slobber, die zeker de moeite waard is om vaker gemaakt te worden. Volgende keer zeker 10 liter !!!

Benodigdheden voor 5 liter wijn:
- 5 pakken Roodfruitsap (merk Goldhorn) van de Aldi
- 5 gram gistvoeding
- 460 gram suiker


Koppelingen in dit artikel:

- Luc's eigen SG tabel
- Zuurmeting deel 1: basiskennis titratie
- Hoe en waarom maak je een giststarter.


Luc Volders

Copyright 2010
Geen deel van deze publicatie mag worden overgenomen
in welke vorm dan ook (web-pagina's, forums of gedrukte tekst)
zonder uitdrukkelijke schriftelijke toestemming van de
auteur.


My mother in law presented me a fruitjuice when I was visiting here. She did it because she knows I don't drink when I have to drive. And the juice was lovely. She bought it at Aldi's. It is called in the netherlands red-fruit juice. The packaging names Apple-Grape-Berries branded Goldhorn.

The juice was refreshing, and full off flavor. Immediately it occurred to me that a wine could be made from this juice. Generally when a juice tastes fine the wine made from it will be fine.


So I bought 6 cartons of 1 liter each. To make the wine you will only need 5 liter. However when I am not familiar with a juice I generally play it safe. So I'd rather buy one to many as having one too short later on.

First I took a look at the packaging.


The manufacturer states that every 100 ml juice contains 12,4 gram sugar. Meaning 124 gram sugar per liter.

So let's check this.


My hydrometer indicates an SG of 54


The refractometer equals this.

The two meters agree. So let's look what my SG table indicates at such an SG. If you want to work with my SG table and don't have it you can download it by clicking here.

As you know my own SG table indicates the SG depending on the acidity level. So we need to know the acidity of the juice first. Measuring acidity is as always done with an acid maesuring kit by means of titration.

If you want to get some base knowledge on measuring acidity you can read my story on acid measuring by clicking here.

The red-fruit juice is a beautiful dark juice. So measuring acidity the 'normal way'will not work as the color change will be hard to see. So we will use the white-tile method for this. Sounds difficult, however it's the most easy way to measure acid in a dark juice.
If your not familiar with this method you can re-read my explanation about this easy method by clicking here.

As measuring acidity is a basic winemaking technique, I urge you to re-read all 5 parts on measuring acidity if your not familiar with the technique. In the last part (the white tile method) you will find references to the other parts.

Ok, back to the tests.


As you can see the juice was still red at the measuring point 4, at 5 the juice got darker. When the added blue indicater had reached 6 the color had changed.


So we have a juice with an acidity of 6.

Now we can check my SG table.

Using my table you will find that at an SG of 1055 and an acidity of 6 there will be 123 gram sugar present per liter juice.
So my table does not derive much off what the manufacturer indicates. So thats what we will be working with: 124 gram sugar per liter juice.

I wanted to make a wine with 12% alcohol. Tasting the juice indicated that the juice had enough flavor to balance this alcohol percentage.

Sugar calculation.

To get 1% alcohol in 1 liter juice you will need 18 gram sugar.

I wanted to get 12% alcohol in 5 liter juice.
For reaching this percentage you will need:
12% x 5 liter x 18 gram sugar = 1080 gram sugar.

The juice itself already contains 124 gram sugar per liter as we have measured and seen on the packaging.
So 5 liter juice already contains 5 x 124 gram = 620 gram.

So to get 12% alcohol I had to add 1080 (needed) - 620 (present) = 460 gram sugar.

Enough theory: lets make wine !!!!

Day 1

I started with making a yeast starter. A yeast starter makes sure that you will add a healthy vigorous fermenting yeast colony to your must.
If you want to know how to make a yeast starter you can read that by clicking here.

In this case I replaced the apple juice in the starter by 1 liter of the red-fruit juice. This gave me two advantages.

- In the first place the must would not be dilluted by apple-juice, and so the must will consist totally of the red-fruit juice.
- Secondly I would know for certain that the red-fruit juice would not contain any conserving chemicals, which were not mentioned on the packaging. If the starter would ferment well it tells me that the complete must will also ferment well.

Day 2

The yeast starter was indeed fermenting vigorously. We can go on with the next steps.

I took 1 liter of the juice and heated it on a stove. While heating amnd stirring I added 360 gram sugar.

Why just 360 gram ???
Well in total I needed to add 460 gram sugar. I already had added 100 gram sugar to the yeast starter so I needed to add...... indeed 360 gram sugar.

When the sugar had dissolved I took the juice from the stove and while stirring I added 5 gram nutrients. Next the juice was cooled down.

While my sugar-juice mixture was cooling down I poured 2 liter red-fruit juice into a carboy. Next I added the cooled down juice and last I added the yeast-starter.

The 5 liter carboy was now filled with 4 liter must. So on purpose there was some space left in case the must started foaming. I did not expect that because the yeast-starter did not foam. You will never know for certain though.

Day 4

The must fermented vigorously however it did not foam. So I filled the carboy to the neck with the remaining liter juice.

After 2 weeks.

The juice finished fermenting and started to clear.

After 2 months.

The wine had cleared completely: time to bottle !!!!!


It turned out to be a light smooth table wine. Certainly worth making more often. Next time at least 10 liter !!!

Ingredients for 5 liter wine:
- 5 cartons Red-Fruit juice (brand Goldhorn) from Aldi's
- 5 gram nutrients
- 460 gram sugar


Links in this story
- Luc's own SG table
- How to make a yeast starter
- Measuring acidity part 1: Basic knowledge on titration


Luc Volders

Copyright 2010
No part of this publication and pictures may be reproduced
in any form (printed text, web-pages, weblogs or forums)
without written permission of the author.

zaterdag 13 november 2010

Vertouw je je hydrometer ???
Trust your hydrometer ????

Scroll down for the English version

Je gelooft het nooit, maar ik ken een wijnmaakster die al jaren wijnmaakt, en geen hydrometer heeft !!!

Dat mag verbazingwekkend lijken maar er is nog iets veel verbazingwekkender......
Ik ken wijnmakers die al jaren wijn maken maar nog nooit de schalen van hun hydrometer goed hebben bekeken..........
En ik beken. Ik hoor daar ook bij.

Hier is het verhaal.

We beginnen bij het begin.

Zoals jullie weten experimenteer ik graag. En nou was ik net bezig met een experiment waar ik de hydrometer en refractometer bij gebruikte toen mij opeens iets opviel.

Het experiment is heel eenvoudig, en ik raad jullie aan het zelf eens te proberen.

Ik begon met 100 gram suiker in een maatbeker te doen en vulde aan tot 1 liter water. Daarna heb ik de suiker opgelost met de mixer.


De hydrometer gaf een SG van 1040 aan. Dit heb ik gecontroleerd met de refractometer en die gaf ook 1040 aan. Dat klopte dus.

De volgende stap was 150 gram suiker in de maatbeker te doen, weer aanvullen tot 1 liter, en goed mixen tot alles was opgelost.


De hydrometer gaf toen een waarde van 1060 aan en de refractometer ook. Alles klopte dus. Dan nog een laatste test.

Ik nam 200 gram suiker. deed dat in de maatbeker en viulde weer aan tot 1 liter. Weer goed mixen.


Nu gaf de hydrometer een SG van 1080 aan en de refractometer ook.
Met andere woorden: de hydrometer en de refractometer gaven dezelfde waardes aan, waardoor ik er van uit kon gaan dat ze betrouwbaar werkten.

Maar toen........

Mijn hydrometer heeft nog 2 extra schaalverdelingen. En er viel mij iets op bij de schaalverdeling die het suikergehalte aangaf. Die zat er gigantisch naast !!!!


Je kunt op de afbeelding klikken om haar te vergroten.

Bij een SG van 1040 gaf de schaal aan dat er 110 gram suiker aanwezig was. Ik weet zeker dat ik 100 gram had afgemeten. Dat is dus 10 gram ofwel 10% te veel !!!!
Bij SG 1060 gaf mijn hydrometer aan dat er bijna 165 gram suiker in de most aanwezig was. Mijn weegschaal gaf toch echt 150 gram aan. Dat is 15 gram te veel of weer 10% te veel !!!!
Als laatste gaf de hydrometer bij SG 1080 een suikergehalte van 220 gram aan. En ik had toch echt 200 gram afgemeten !!! Weer 20 gram ofwel 10% te veel.

Met andere woorden de suikerschaal van mijn hydrometer klopt niet. Hij geeft overal 10% te veel aan. Als ik dus wijn maakte en daarbij uitging van de suikerschaal van mijn hydrometer, dan zat ik er elke keer 10% naast. Ik zou dus veel minder alcohol in mijn wijn krijgen als waar ik verwachtte.

Zonder al te veel het technische vlak op te gaan wil ik even meldden dat het verschil eigenlijk nog groter als 10% is. Een most met een bepaald SG bestat immers niet alleen uit suiker. Er zit ook zuur in opgelost, tannine's, smaakstoffen, kleurstoffen etc. etc. etc. Met andere woorden je afwijking zal nog groter als de 10% worden.

Nu zullen de meeste wijnmakers uitgaan van de SG schaal die uiteraard wel klopte. Maar je zult maar blindelings uitgaan van de suikerschaal. Dan heb je elke keer te weinig suiker toegevoegd bij het bereiden van je most. En dat terwijl je ervan mag uitgaan dat je hydrometer een precisie instrument is, en de fabrikant weet waar hij over praat.

Wat zegt de fabrikant.

Voordat ik besloot dit op mijn web-log te zetten besloot ik de fabrikant een kans te geven zijn fout te corrigeren of op zijn minst uit te leggen.

Ik noteerde precies het model van de hydrometer, en het jaartal 1983 dat op de schaal stond aangegeven. Er kon dus geen misverstand ontstaan betreffende over welke meter het zou gaan. Deze gegevens met de foto van de schaal die hierbovenstaat mailde ik aan de technische service dienst van de fabrikant. Ik kreeg een mail terug van de Laboratory manager.

In eerste instantie meldde hij dat hij er over moest nadenken en er snel op zou terugkomen.

Dat deed hij. Maar in zijn mail probeerde hij uit te leggen dat een SG schaal nooit 100% betrouwbaar kon zijn. Ik meldde hem dat hij daar gelijk in had maar dat ik niet in de SG schaal geinterreseerd was. Het ging om de suikerschaal. Toen begreep hij het, en ging naar de suikerschaal kijken. Een week later kreeg ik het volgende antwoord:

I have had a search to see how the scale was derived but it is historical and its origins have been lost in the midst of time.


Vrij vertaald:
Ik heb gezocht hoe de schaal was opgesteld, maar hij is historisch en de oorsprong is in de loop der tijd verloren gegaan.

Met andere woorden. Het bedrijf produceert een hydrometer, en die heeft een schaal erop gedrukt waarvan ze niet het minste idee hebben hoe de schaalverdeling ooit tot stand is gekomen !!!!
En als ze niet weten hoe die schaal tot stand is gekomen, hoe weten ze dan dat hij klopt ???

Natuurlijk nam ik daar geen genoegen mee en mailde terug dat historische gegevens best in de loop der tijd mogen bijgesteld worden. We geloven immers ook niet meer dat de aarde plat is. Daarnaast gaf ik het argument dat een zichzelf respecterende fabrikant van precisie apparatuur best nauwkeurig te werk mocht gaan. Ik kon ook niet geloven dat niemand sinds 1983 daar ooit op gereageerd had.......

Als antwoord daarop kreeg ik terug:

As these scales are readily available I see little value to be gained from investigating the history behind our approximate scales.
This is the reason why as a small family firm I can not spend hours of my time locating historical information for you.

Vrij vertaald:

Er zijn genoeg conversie programma's en schalen beschikbaar waardoor er geen waarde gehecht kan worden aan het onderzoek over hun schalen die benaderde waarden aangeven.
Dat is de reden dat een klein familiebedrijf de tijd niet kan vrijmaken om de historische informatie te achterhalen.

Verder verwees de manager naar Vinocalc. Vinocalc is een calculatie programma speciaal voor het maken van wijn, dat ik toevalligerwijs wel eens gebruikt had in het verleden. Hij zei dat ik daarin het SG maar eens moest invoeren om te zien wat voor suikergehalte er zou uitkomen.


Natuurlijk deed ik dat en ik heb het resultaat hier als screendump bijgevoegd. Je ziet dat bij een SG van 1040 Vinocalc aangeeft dat er 103.88 gram suiker in de most zit. Ook een afwijking (meer als 4%) maar veel minder als de 10% die de meter aangeeft.
Toen ik hem meldde dat Vinocalc dichter bij mijn metingen uitkwam als dat zijn schaal aangeeft antwoordde hij:

I chose the Vinocalc completely at random (I have no reason to believe it is 'correct') but it shows readings which are easily within 10% of those on our scale. The fact that our scale says in capital writing approximate, means it is approximate

Vrij vertaald:

I koos Vinocalc willekeurig (ik heb geen reden om aan te nemen dat het 'correct' werkt) maar het geeft een waarde aan die binnen 10% van de waarden op onze schaal valt. Aangezien op onze schaal met grote letters BIJ BENADERING staat, betekend het ook dat de getallen bij benadering zijn.

Dus eerst stuurt de manager mij naar Vinocalc om zijn ideetjes te staven, maar wanneer dat niet goed voor hem uitkomt zegt hij dat hij 'geen reden heeft om aan te nemen dat Vinocalc correct werkt'. Op die manier heeft hij zichzelf volkomen belachelijk gemaakt.

We moeten er allemaal niet te zwaar aan tillen. De meeste wijnmakers gebruiken deze schaal toch niet. En ik neem de vrijheid om de naam van de fabrikant niet te publiceren. Ik blijf het echter vreemd vinden dat een fabrikant die een SG schaal vrij nauwkeurig kan opstellen (nogmaals: er was niets aan te merken op de SG schaal), op dezelfde meter een suikerschaal kan afdrukken die meer dan 10% afwijkt. Te meer daar je dit heel eenvoudig kunt testen en corrigeren, zoals het eerste deel van mijn verhaal bewees.

Case closed.

Links in dit artikel:


- Vinocalc


Luc Volders

Copyright 2010
Geen deel van deze publicatie mag worden overgenomen
in welke vorm dan ook (web-pagina's, forums of gedrukte tekst)
zonder uitdrukkelijke schriftelijke toestemming van de
auteur.


Believe it or not, I do know a female wninemaker that has made wines for years and does not own a hydrometer !!!!

This may sound amazing but there are things even more amazing !!!
I know winemakers that have made wine for years and never looked closely at the scales of their hydrometers......
And I confess. I can be included in that category.

Now many of you do not use the SGF tables out of books, but just use the hydrometer and trust on it. You look at the scale and derive from that how much sugar to add to your juice. Well be carefull.

Here is the story.

Let us start at the beginning.

As you will all know by now i like to experiment. And I just started an experiment in which I used the hydrometer and refractometer together and something drew my attention.

The experiment itrself is simple, and I urge you to reproduce it yourself.

I started by weighing 100 gram sugar in a beaker and added water till the 1 liter mark. Next I dissolved the sugar using a mixer.


Now the hydrometer gave an SG of 1.040. I checked it with my refractometer which also gave an SG of 1.040. So that was allright.

Next I took 150 gram sugar and again added water to the 1 liter mark. The mixer again made sure the sugar dissolved nicely.


The hydrometer hit the 1.060 mark and so did the refractometer. Both gave the same result. So everything was in order. A final test remained.

This time 200 gram sugar and water added to a liter. Again the mixer stirred the solution until the sugar was totally dissolved.


Now the hydrometer pointed at an SG of 1.080 and the refactomter gave the same SG.

So these 3 test showed the same figures for the hydrometer and refractometer. So I could be assured they worked well.

And then........

My hydrometer has 2 more scales. And I noticed something wrong at one of the scales: the Approximate Sugar scale. It was really off !!!


You can click on the image to enlarge it.

At an SG of 1.040 the hydrometer sugar-scale indicated that there would be 110 gram sugar. I knew for sure that I measured 100 gram. So the sugar scale indicated 10 gram being 10% to much.
At an SG of 1.060 the Sugar scale indicated 165 gram sugar. I measured 150 gram. Again the sugar-scale pointed 15 gram or 10% too much.
And at an SG of 1.080 the hydrometer pointed at 220 gram sugar whilst I measured 200 gram. Again the hydrometer sugar scale pointed 20 gram or 10% to high.

This means that the sugar scale of my hydrometer is out of line. It indicates overall 10% to much. So when I was making wine using only the sugar scale I would be 10% off each time. So being specific: I would get less alcohol in my wine as I expected.

Without getting to technical I would like to point out that the difference is even more as 10%. A must with a certain SG is not just sugar like my solution was. I contains acid, tannin, flavor components, colour components etc. etc.etc. So the deviation would even be more as 10%.

Now most winemakers will not use the Sugar scale. They will use the SG scale which was up to standards. But imagine being a winemaker that would NOT use the SG scale, and would use the sugar scale in good faith. Then you would have added not enough sugar at the preparation of your must. And that while you migh expect your hydrometer to be a precision instrument.

The manufacturer's answer.


Before I decided to put this story on my web-log I decided to give the manufacturer a chance to correct this fault, or at least explain it.

I wrote down the exact model and the date (1983) that was listed on the scale. So there could be no misunderstanding about which meter this was about. I mailed the technical staff of the manufacturer these details together with the above seen photograph of the scale. I received an answer from the Laboratory Manager.

At first he notified me that he needed to think about this and would get back to me as soon as possible.

Indeed he did. In his mail he tried to explain that an SG scale could never be 100% reliable. I mailed back that he was right. However I was not interested in the SG scale as this was accurate. I was interested in the Sugar Scale. He understood and promised to look after the sugar scale.
It took him about a week to come up with this answer:

I have had a search to see how the scale was derived but it is historical and its origins have been lost in the midst of time.

Now this means I have bought a hydrometer with a scale printed on it from a company that hasn't the faintest clue where that scale came from !!!!
And if they do not know where that scale originated from, how can they be sure it is accurate ???? This is really hilareous.

So I could not take this for real. I mailed them that historical data could be proven wrong in due time. We also do not believe anymore that the world is flat, or that the sun circles the earth. I argumented that a self-respecting manufacturer of precision instruments really should try to give some accurate information. I neither could believe that nobody had reacted on this since their scale had been published in 1983....

So the answer I got was this:

As these scales are readily available I see little value to be gained from investigating the history behind our approximate scales.
This is the reason why as a small family firm I can not spend hours of my time locating historical information for you.

The scales he was talking about were the SG to sugar scales available in computer programs. And he pointed me to Vinocalc. Vinocalc is a winemaking calculator that I happen to have used myself in the past. He told me to put some SG data in Vinocalc to see what amount of sugar they would come up with.
As an answer to this I mailed him back that, if he would try that himself, he could see that my observations were far more accurate as the scale of their hydrometer was.


I even included a screenshot from Vinocalc. You can see at the specified gravity it indicates 103.88 gram sugar. Still a bit off but within a reasonable range.

And then he came up with this really ingenuous answer:

I chose the Vinocalc completely at random (I have no reason to believe it is 'correct') but it shows readings which are easily within 10% of those on our scale. The fact that our scale says in capital writing approximate, means it is approximate.

So first he points me to Vinocalc, and when the outcome does not suits his goals he tells me that he has no reason to believe Vinocalc is correct.... Now that is really hilareous.

Well, let us take this lighthearted. Most winemakers will not use this scale anyhow. And I take the liberty not to publish the manufacturers name. I do however think it is peculiar that a manufacturer who is able to produce a fairly accurate SG scale on his hydrometer (again, there is nothing wrong with the SG scale), prints a sugar scale on that same hydrometer that is off more as 10%. This appears more strangely to me as you can easily test the scale, like the first part of this story showed.

Case Closed.

Links in this article:


- Vinocalc

Luc Volders

Copyright 2010
No part of this publication and pictures may be reproduced
in any form (printed text, web-pages, weblogs or forums)
without written permission of the author.

zaterdag 30 oktober 2010

Bakkersgist / Baking Yeast

Scroll down for the English version

Jarenlang woedt er al een (soms felle) discussie tussen wijnmakers over de vraag of je al of niet bakkersgist kunt gebruiken om een fatsoenlijke wijn mee te maken. Beginners stellen deze vraag vaak op wijnmakers forums (laatst nog op een Amerikaans forum) en gevorderde wijnmakers roepen dan meteen dat je vooral GEEN BAKKERSGIST moet gebruiken.

Als er dan wordt gevraagd waarom je dan geen bakkersgist moet gebruiken dan zijn de antwoorden legio:
- Bakkersgist haalt niet genoeg alcohol omdat de gist er niet tolerant voor is.
- Bakkersgist is gemaakt om brood te laten rijzen en maakt dus veel CO2 maar
weinig alcohol.
- Wijn gemaakt met bakkersgist zal moeilijk of niet klaren
- Bakkersgist kan nare smaken afgeven
- Wijn gemaakt met bakkersgist heeft een gistsmaak
- Bakkersgist veroorzaakt veel sediment

Redenen genoeg om dus geen bakkersgist te gebruiken. Maar toch blijft de vraag telkens weer opduiken.

Ik ging dus maar eens mijn literatuur raadplegen.
Sommige boeken noemen bakkersgist helemaal niet. Andere boeken schrijven dat je het niet moet gebruiken zonder opgave van redenen. Weer andere boeken noemen de redenen die hierboven zijn geschreven om het niet te gebruiken. Jac Lambrechts voegde daar nog aan toe dat bakkersgist zich snel vermenigvuldigd waardoor veel CO2 wordt geproduceerd en daardoor veel schuim.

Alleen C.J. Berry schrijft in zijn boek Zelf wijn maken:
Vele wijnmakers zweren nog steeds bij bakkersgist. Het is jammer als ze dat doen zonder ooit kennis gemaakt te hebben met de echte wijngistrassen die nu te koop zijn.

En het boek van Berry is voor velen nog steeds de wijnmakersbijbel. Ook al stamt het boek uit 1960. En zowel Berry als de encyclopedien geven aan dat wijngist en bakkersgist familie van elkaar zijn.

Maar waar komt dan het verhaal vandaan dat je geen bakkergist moet gebruiken bij het wijnmaken.

In meer boeken (en ook in wijnmakers tijdschriften zoals het helaas ter ziele gegane Proost) kom ik tegen dat auteurs elkaar tegenspreken !!!
Maar meer en meer kom ik er achter dat auteurs ook vaak klakkeloos teksten en ideeen van elkaar overnemen zonder te testen op waarheid.

Tijd dus voor een experiment !!!

Ik besloot twee wijnen maken waarvan een wijn met wijngist is gemaakt en de andere wijn met bakkersgist.

Om een dergelijk experiment succesvol te laten verlopen moet je dus uitgaan van een identieke situatie.

Ik begon met voor beide wijnen een giststarter te maken.
Ik kocht een pak appelsap bij de Aldi van het merk Goldhorn (zonder conserveermiddelen) van 1,5 liter. Ik kookte het sap en al roerende voegde ik 150 gram suiker toe. Na afkoelen voegde ik gistvoeding toe en verdeelde de zo ontstane most over 2 ontsmette pet flessen. Bij de ene fles deed ik 7 gram bakkersgist en bij de andere fles 7 gram wijngist. Beide flessen werden afgesloten met een stukje keukenpapier vastgezet met een elastiek.

De twee starters werden gemerkt. De flessen kwamen naast elkaar te staan. De omstandigheden waren dus voor beide gisten gelijk.

Een dag later werd de eigenlijke most geprepareerd.

Ik had 2 lege gistingsflessen van elk 5 liter. En ik wilde een wijn maken van 12% alcohol. In mijn berekeningen (zie weer http://wijnmaker.web-log.nl/wijn_weblog/2007/03/20/index.html)
ga ik ervan uit dat je 18 gram suiker nodig hebt om 1% alcohol te krijgen.

Voor de 2 flessen had ik dus nodig 18 (gram voor 1%) x 12 procent x 10 liter = 2160 gram suiker.

Ik heb deze 2160 gram suiker opgelost in 7 liter van hetzelfde appelsap dat voor de starter werd gebruikt. Ook hier werd het sap weer gekookt en tijdens het afkoelen heb ik nog wat citroenzuur en gistvoeding toegevoegd.

Toen de most was afgekoeld heb ik hem verdeeld tussen de 2 flessen.


Ondertussen stonden de giststarters al flink te gisten.

Op de foto zie je links de starter die met bakkersgist is gemaakt en rechts de starter met wijngist. Je ziet dat er wel degelijk verschillen zijn tijdens het gisten.

De bakkersgist vormt inderdaad veel meer schuim en is erg troebel.


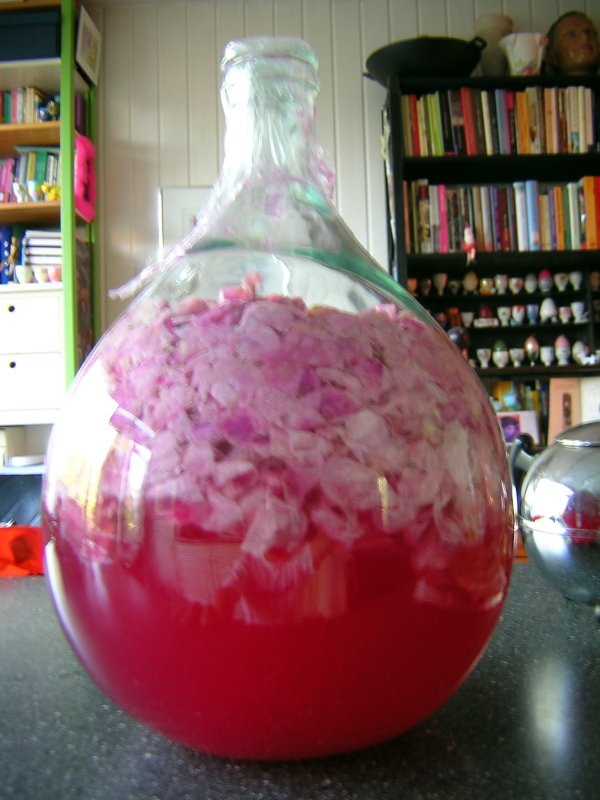
Nu werd de giststarter aan de most toegevoegd. Na een tijdje stonden beide mosten inderdaad flink te gisten. Het fenomeen dat zich bij de starter voordeed kwam ook tijdens het gisten van de most terug:

Zoals je ziet staat de linker fles flink te schuimen en is de most erg troebel. Dit is inderdaad de most met bakkersgist.

Na twee weken waren beide flessen nog langzaam aan het gisten. De most met bakkersgist was nog steeds erg troebel. En toen ging ik op vakantie.
Helaas kan ik dus niet vertellen welke wijn als eerste was uitgegist.

Maar 7 weken na de start waren de beide wijnen uitgegist en begonnen ze te klaren.


De linker fles is weer de fles met wijn die met bakkersgist is gemaakt. Je ziet dat hij nog iets troebeler is als de rechter fles. Ook heeft de bakkersgist voor iets meer sediment gezorgd.

Jac Lambrechts en een aantal anderen hadden dus in ieder geval gelijk als ze zeiden dat bakkersgist veel schuim veroorzaakte en meer sediment (doordat de gist zich sneller vermenigvuldigd en afsterft). Hoewel de hoeveelheid sediment slechts een fractie meer was als bij de wijngist.

Na weer twee weken (dus negen weken na de start) was de wijn helder. De tijd was aangebroken om de nodige metingen te gaan uitvoeren en de verschillen te gaan onderzoeken.

In de eerste plaats doen we een zicht-onderzoek.
Beide wijnen zijn geklaard en helder. Beide wijnen hebben een iets gelige tint. Waar is waar: de bakkersgist-wijn is iets donkerder geel. Maar als je ze los van elkaar ziet, dan kun je het verschil niet waarnemen.


Op de foto zie je rechts de bakkersgist-wijn.

Dan gaan we het tweede punt onderzoeken. We gaan met titreren de zuurgraad bepalen.

De bakkersgist-wijn gaf een zuurgraad aan van 9
De wijngist-wijn gaf een zuurgraad aan van 8

De wijngist gebruikt dus iets van het zuur tijdens het gistingsproces en de bakkersgist niet. Helaas kan ik niet meten welk zuur er verlaagd was. Appelsap bevat appelzuur en daarnaast had ik zelf nog wat citroenzuur toegevoegd.

Daarna ben ik de alcohol gaan meten. De metingen zijn verricht met een wijnweger en met een SG-meter. Alle metingen zijn verricht middels de inkook-methode.

De Bakkersgist-wijn kwam uit op 10,44%
De Wijngist-wijn kwam ook uit op 10,44%

Dit verbaasde mij ten zeerste. Roepen dat bakkersgist slechts een laag alcohol percentage kan produceren is dus gewoon niet waar. Maar meer verbaasd was ik dat de bakkersgist dus gewoon niet onderdeed voor de wijngist op het gebied van alcohol percentage.

In beide gevallen had de wijn nogal wat restsuikers. Hij proefde ook zoet. Het eind SG kwam vrij hoog uit. Ook dat verbaasde mij. Maar een klein onderzoek bracht de oorzaak snel boven water. Ik was er vanuit gegaan dat ik om 12% alcohol te krijgen 216 gram suiker per liter nodig had. Ik had dan ook 2160 gram suiker aan de totale hoeveelheid sap toegevoegd. Maar op het pak staat dat het appelsap zelf al 100 gram suiker per liter bevat. Mijn most had dus geen 216 maar 316 gram suiker per liter. Hierdoor is het eind-SG dus inderdaad hoog.

Deze hoge start-SG brengt een paar andere interressante vragen voort.
- Mijn originele most had dus 316 gram suiker per liter hetgeen genoeg is om 18% alcohol te geven. Maar zowel de bakkersgist als de wijngist stopten op 10,4%.
- De gisten zouden zo wie zo moeite gehad moeten hebben om in een most met zo een hoog suikergehalte aan de slag te kunnen gaan, maar de gisting verliep vlekkeloos.....

Als laatste maar niet onbelangrijkste de drink-test.

Ik had twee etiketten ontworpen. De wijn met bakkersgist noemde ik ballonwijn en de wijn die met wijngist gemaakt was noemde ik appelsap wijn. In mijn haast (ik heb altijd te weinig tijd) heb ik een plaatje van een pak appelsientje op het etiket gezet, maar het sap was van Goldhorn (huismerk van de Aldi). Ere wie ere toekomt.....

De naam ballonwijn was met opzet gekozen. Hierdoor kon een 'niet ingewijde' in ieder geval niet zien dat de wijn met bakkersgist was gemaakt. Dat maakte het onafhankelijk proeven van mijn proefpersonen objectief.

Ik heb verschillende proefpersonen de wijnen blind laten proeven en hun mening laten geven.
In de eerste plaats is iedereen het erover eens dat het beiden lekkere wijnen zijn.
Maar de wijngist-wijn is milder van smaak. De wijn heeft een zachtere afdronk. Dat kan te maken hebben met de wat lagere zuurgraad. Maar de algemene smaak is wat meer fluweelzacht.
De bakkersgist-wijn is wat 'ruwer' in de afdronk maar bied daarentegen een breder smaak spectrum. Verschillende componenten zijn in de smaak te onderscheiden al zijn ze niet definieerbaar.
De proefpersonen zijn verdeeld over wat de lekkerste van de twee wijnen is. Maar iedereen was stomverbaasd toen ik bekendmaakte dat de Ballonwijn gemaakt was met bakkersgist.

Een tweede test bestond eruit dat ik een groep van 6 proefpersonen de ballonwijn liet proeven zonder te vertellen wat het was. Iedereen was het er over eens dat de wijn wel zoet was maar erg lekker. Na het bekendmaken waar de wijn van was gemaakt was iedereen stomverbaasd en wilde een aantal proefpersonen dat ik het recept voor hun opschreef....

In geen geval is er bij de bakkersgist-wijn sprake van een nare bijsmaak of van een gistsmaak zoals algemeen wordt gezegd.

Conclusie:

- Bakkersgist produceerd schuimt meer als wijngist
- Bakkersgist produceerd meer sediment als wijngist
- Bakkersgist klaart net zo goed als wijngist.
- Bakkersgist geeft de wijn een iets andere kleur (donkerder geel)
- Bakkersgist tast de zuurgraad van de wijn niet aan.
- Bakkersgist produceert even veel alcohol als wijngist
- Bakkersgist is in staat om een lekkere wijn te produceren.
- Bakkersgist geeft een wat ruwere smaak aan de wijn
- Bakkersgist geeft meer smaak variatie aan de wijn
- Bakkersgist geeft geen nare bijsmaken
- Bakkersgist geeft geen gist-smaak aan de wijn.

Nawoord:
Tot nu toe heb ik zelf dit experiment pas een keer uitgevoerd. Dus eigenlijk is het niet echt representatief.
Je moet om een representatief onderzoek uit te voeren diverse gelijksoortige experimenten uitvoeren maar dan met verschillende sappen. Wellicht ga ik dat in de toekomst nog doen.

Maar ondertussen zijn een aantal mensen in mijn directe omgeving zijn ook begonnen met het maken van appelsap-wijn met behulp van bakkersgist. De resultaten zijn tot nu toe altijd positief uitgevallen. Een van de mensen die deze wijn gemaakt had haalde zelfs een alcohol percentage van 14,8%. Dit is natuurlijk veel te veel voor een appelwijn maar fantastisch voor een experiment met bakkersgist !!!!

Naast dit experiment heb ik ondertussen wel al vaker bakkersgist gebruikt om wijnen mee op te zetten. Een van de wijnen is de appel-perzik wijn die ik op het bibere-pinksterweekeinde in 2008 aan collega wijnmakers liet proeven. De mening was overdeeld: de wijn was lekker. Een stuk of 10 verschillende wijnen heb ik ondertussen met bakkersgist gemaakt en er is geen enkele slechte wijn uit voortgekomen !!!!

Waarschijnlijk heb je wel gezien dat deze test wijnen zijn gemaakt zonder sulfiet. Een volgende test kan uitwijzen of bakkers-gist wel of niet sulfiet resistent is, maar dat viel buiten dit experiment. De test wees wel uit dat het mogelijk is een fatsoenlijke wijn te maken zonder gebruik van sulfiet, maar dat is een totaal andere discussie.

In tegenstelling tot wat ons geleerd wordt is het dus wel goed mogelijk om een lekkere wijn met bakkersgist te maken. Berry suggereerde dat eigenlijk al, maar gaf aan dat wijngist een beter resultaat geeft.

Veel mensen hebben in hun jeugd wel eens zonder enige kennis van zaken (sg, zuur, hygiene) wijn gemaakt met bakkersgist. Deze 'wijnen' zullen daardoor vaak mislukt zijn, en waarschijnlijk komen daar de verhalen vandaan dat bakkersgist geen goed resultaat geeft. Maar wij zijn dat station gepasseerd en hebben wel alle vereiste kennis.

Als je twee wijnen naast elkaar drinkt waarvan de een met wijngist en de ander met bakkersgist is gemaakt dan proef je duidelijk verschil. Maar dat verschil proef je waarschijnlijk ook (volgende experiment in aantocht) als je verschillende wijngisten had gebruikt. Als je de wijnen los van elkaar drinkt zijn ze beiden gewoon lekker.

Ga ik dus de wijngist overboord gooien ???
Nee, maar ik ga zeker vaker met bakkersgist aan de slag, en als ik ooit geen wijngist in huis heb zal ik zeker niet aarzelen om bakkersgist te gebruiken.


Luc Volders

Copyright 2010 Geen deel van deze publicatie mag worden overgenomen in welke vorm dan ook (web-pagina's of gedrukte tekst) zonder uitdrukkelijke schriftelijke toestemming van de auteur.


For several years there has been a (sometimes fiersome) discussion wether or not bakers yeast can be used to make a decent wine. Newbies often ask this question on winemaking forums and experienced winemakers immediately respond with yelling that using bakers yeast is totally out of the question, and certainly bad winemaking practice.

So if the newbies ask why this is there are lots of answers:
- Bakers yeast wil only gain low alcohol as the yeast has no alcohol tolerancy.
- Bakes yeast is produced for rising bread so it will produce low alcohol and loads of CO2.
- Wine made with bakersyeast will not clear or clear only with great difficulty.
- Bakers yeast will produce off-tastes
- Bakers yeast will introduce a yeast taste in the wine
- Bakers yeast will produce loads of sediment.

So reasons enough for not using bakersyeast. But still the question rises every now and then. Therefore I consulted all my winemakers literature.

Some books do not mention bakers yeast at all. Others mention that you should not use it without stating why. Still other books advise not to use bakers yeast for the reasons mentioned above. Jac Lambrechts (a famous writer of a Dutch/Belgium winemaking book) adds that bakesr yeast will multiply fast and therefore produces lots of CO2 which causes a lot of foam.

Only the well-known C.J. Berry writes in his book First steps in winemaking:
Many winemakers, one must admid, still adhere to bakers or brewers yeast, but it is a pity to do so without having tried some of the excellent true wine yeasts now on the market.

Berry's book is still for many the winemakers bible, although dates back from 1960. Ans Berry as well as encyclopedias state that bakers yeast and wine yeast are related.

So where does the story, not to use bakerts yeast, come from ???

More and more I read in books (and winemakers magazines) stories that contradict. But more and more I start to believe that authors copy stories and ideas from eachother without testing if the ideas really are true.

So it's experimenting time !!!!

I decided to make two identical wines with just one different ingredient: wineyeast and bakers yeast.

To succeed such an experiment one has to create identical situations.

I started with making a yeast starter. I bought applejuice from the Aldi store branded Goldhorn (without any preservations) in one 1,5 liter pack.
I boiled the juice and while stirring I added 150 grams sugar. After cooling down I added yeast nutrient and divided the starter between two disinfected pet bottles. In the first bottle I added 7 gram bakers yeast and in the second 7 gram wine yeast. On top of both bottles a piece of kitchen-paper was fastened with a rubber band.

The two starters were labeled and the bottles put next to eachother. So the circumstances were equal.

Next day the actual must was prepared.

I had two 5 liter secondaries. I wanted to make a wine with 12% alcohol. My calculations tell me I need 18 gram sugar for obtaining 1% alcohol.

So for the 2 bottles I needed 18 (gram for 1%) x 12 procent x 10 liter = 2160 gram sugar.

I dissolved the sugar in 7 liter of the same applejuice I used for the starter. Again the juice was boiled (in one large pan) and while cooling down I added some citric acid and yeast nutrient.

When the must reached 25 degrees celsius I divided it between the 2 secondaries.

Meanwhile the yeast starters were fermenting vigorous.

The photo shows the starter with the bakers yeast on the left and the starter with wine yeast on the right side. It is obvious that there are differences during fermenting.

The bakers yeast indeed forms much more foam and is turbid.

The starters were added to the must, and after a short while both secondaries were fermenting vigorously. The phenomenon that showed in the starters repeated in the must:

As you can see the must on the left is turbid and foams heavily. This indeed is the must with bakers yeast.

About two weeks later fermenting was slow. The must with bakertsyeast still was turbid. Then I went on holliday. So unfortunately I can not tell you which one stopped fermenting first.

But seven weeks later both wines ended fermentation and started to clear.


Again the bottle on the left is the must with bakers-yeast. As you can see it is still a bit more turbid as the one on the right. And indeed the bakers yeast produced more sediment.

Jac Lambrechts and others were so far right that bakers yeast produces more foam and sediment (by faster multiplication and dying of the yeast). But the sediment was less as expected and just a fraction more as the wine yeast produced.

Again two weeks later (so 9 weeks after starting) the wine was clear. It was time to execute the necessary measurements to examine the differences.

First a visual examination.
Both wines were clear and bright. Both wines have a yellow hue. But the wine made with the bakers yeast is a bit darker. When examined apart from eachother it is difficult to see the difference.


On the photo the bakers-yeast wine is on the right side.

Now for the second item of examiniation. We measure acidity with a titration kit.

The bakers yeast wine had an acidity of 9.
The wineyeast wine had an acidity of 8

So the wineyeast uses some of the acid during fermentation and the bakers yeastdid not. Unfortunately I can not measure which acid was reduced. There was malic acid in the aplle juice and I added citric acid.

Next measurement was alcohol. The measurements were made with a wine weigher and with a hydrometer. All measurements were done using the cooking-method.

The bakers yeast yielded 10.44% alcohol.
The wine yeast yielded also 10.44% alcohol

This really surprised me. Therefore saying that bakers yeast will just yield a low alcohol wine just is not true. But I was more astounded by the fact that bakers yeast really competed the wine yeast on the alcohol percentage.

In both cases the wine had residual sugars. It tasted sweet. The end SG was rather high. That also surprised me. A further investigation on this quickly explained the cause. I started from the calculation that to gain 12% alcohol I needed 216 gram sugar per liter. So I added 2160 grams for the 10 liter wine I made. But the apple-juice packaging stated that the juice itself already contained 100 gram sugar per liter. So my initial must did not have 216 but 316 gram sugar per liter. Therefore the end SG was indeed high.

This high starting SG brings some other questions foreward:
- The original must had 316 grams sugar per liter which is enough to gain 18% alcohol. But both yeasts finished at 10.44% alcohol.
- Both yeasts should have had trouble starting fermentation in a must with such a high SG, but fermentation went on without effort....

And now on to the last but not least important test: the drinking.

I designed two labels. The wine made with bakers yeast I named ballon-wijn (balloon wine). The wine made with wine yeast was called apple-juice wine. In a hurry (I always have a time shortage) I took a picture of another brand apple juice and put it on the label. But the right brand was Goldhorn (the brand from the Aldi Shops).

The name ballon-wijn was chosen on purpose. With this name a layman could not guess the wine was made with bakers yeast. This made the independend testing of my testing panel an objective happening.

I let several people taste both wines and have them give their opinion. In the first place everyone agreed that both were great wines. However the wine made with wine yeast had a mild taste. This can be due to the lower acidity, but general consensus was that the wine was soft as velvet.
The wine made with bakers yeast had a more rough character, but had a broad taste spectrum. There are more components determined in the taste although they could not be defined.
The test panel was devided about which of the both wines was best. But everybody was astonished to hear that the ballon-wijn was made with bakers-yeast.

A second test was made by having 6 people tasting the ballon-wijn without telling what it was. Everyone agreed that the wine was sweet but delicious. Again everyone was surprised that the wine was made with bakers yeast and several asked me to write down the recipe although none of them was a winemaker......

Certainly there was no off-taste or a yeast-taste as is often declared about bakers-yeast in winemaking.

Conclusion:

- Bakers-yeast produces more foam as wine-yeast
- Bakers-yeast produces more sediment as wine-yeast
- Bakers-yeast will clear just as fine as wine-yeast
- Bakers-yeast gave a slightly darker color
- Bakers-yeast did not alter the acidity
- Bakers-yeast produces as much alcohol as wineyeast
- Bakers-yeast certainly produces a fine wine
- Bakers-yeast gives a little rough edge to the wine
- Bakers-yeast gives more taste variation in the wine
- Bakers-yeast gives no off-taste
- Bakers-yeast give no yeast taste

Afterword:

Until now I have done this experiment just once. So it is not really representative.
To have a valid research outcome more similar experiments should be made with different juices. May be this is something for the future.

However some of my friends have started to make apple-juice wine with bakers-yeast. The results are until now very good. One of them even gained an alcohol percentage of 14,8% with the above recipe. Way too much for an apple wine, but excellent for an experiment with bakers yeast.

In the meantime I myself have made several wines with bakers yeast. One of the wines was an apple-peach wine which I served my fellow winemakers at the Bibere-withsun weekend this year. Everyone of them was astonished that such a good wine could be made with bakers-yeast. About 10 wines I have made until now with bakers yeast and all of them came out great !!!

You will probably have noticed that these test wines were made without the use of sulphites. A next test will show if bakers yeast is sulphite resistant or not, but that was beyond the scope of this experiment. The experiment DID however show that it is possible to make a descent wine without using sulphite, but that is a different discussion alltogether.

So contrary to what we have always been told it is very well possible to make a good wine with bakers-yeast. Mr. Berry had suggested it already but stated that wine-yeast could yield a better result. But initially he stated that most winemakers still adhered to bakers yeast. And if it really produced awfull wines they would not have used it for so many years.

Many of us have made in their youth without any knowledge (like sg, acidity and hygiene) wine with bakers yeast. These 'wines' will have been failures in many cases and probably this resulted in the sories that bakers-yeast could not produce a good wine. But we are past this stage and do have the knowledge how to produce wine. So the failure was probably in other aspects as the yeast.

If one tastes two wines and one is made with bakers yeast one tastes differences. But these differences will probably also be noticed when two wines were made with different wine yeasts (another experiment coming up). When you drink the wines seperately you just drink two fine wines.

So am I tossing the wine yeast ???
No I am not, but I am definately going to experiment more with bakers yeast. And when I am making wine and by coincidence have run out of wine-yeast I will certainly not hesitate to use bakers-yeast.

Luc Volders

Copyright 2007 No part of this text or pictures may be used in other publications (including web-pages, forums or printed text) without written permission from the author.