Posts tonen met het label Experiment. Alle posts tonen

zaterdag 6 oktober 2012

Echt maar 1 ???
Just one ???

Scroll down for the English version

Soms lees je op forums wel eens de horrorverhalen van wijnflessen die spontaan opnieuw zijn gaan gisten. Daar zijn twee dingen voor nodig. De wijn moet restsuiker bevatten en er moeten levende gistcellen aanwezig zijn.

Maar ook een most of sap kan spontaan gaan gisten. Gistcellen die in de lucht zitten of een verontreinigde lepel of ander attribuut kan ervoor gaan zorgen dat een sap gaat gisten.


En zoals jullie in het verhaal over het bevriezen van wijn om de gisting te stoppen konden lezen kunnen gistcellen zelfs bevriezing overleven. Maar hoeveel gistcellen zijn er nodig om een gisting op gang te brengen. Of opnieuw te laten starten.

Nu wordt er al jaren op forums geschreven dat er slechts 1 gistcel nodig is om een hele nieuwe kolonie te starten en je wijn opnieuw te laten gisten. Dat wilde ik wel eens onderzoeken.

Eerlijkheidshalve moet ik zeggen dat ik het experiment wel een handje heb geholpen. Ik maakte een sap met optimale condities om een gistkolonie te starten.

Ik nam een liter appelsap, kookte die en voegde daar extra suiker aan toe zodat er 200 gram suiker in aanwezig was. Ook voegde ik gistvoeding toe.
Ondertussen steriliseerde ik een lege colafles met sulfiet.

Op deze manier kon ik er vrij zeker van zijn dat het MIJN korreltje gist was die iets in werking zou zetten en geen bacterien of gistcellen die al aanwezig waren in het sap of in de fles.

Daarna nam ik een potje wijngist en haalde daar voorzichtig 1 korreltje gist uit.

Wat wij met het blote oog als 1 korreltje gist zien, zijn natuurlijk al een aantal gistcellen. Maar ik kan die hoeveelheid zonder laboratorium apparatuur niet verder verkleinen. We zullen het ermee moeten doen.

De theorie vertelt ons dat een gistcel zich elk halfuur opdeelt. Dat wil zeggen dat als je met 1 gistcel start er na een halfuur 2 gistcellen zijn. Na een uur zijn dat er 4, na 1,5 uur 8, na 2 uur 16 etc etc.
 Dit proces gaat door totdat er een bepaald verzadigingspunt bereikt is. Daarna gaat de gisting wel door maar zijn er zoveel gistcellen aanwezig dat de voortplanting stopt. We praten dan over miljoenen gistcellen per cl most. 


Dag 1


Op vrijdagochtend om 9  uur liet ik het korreltje gist in mijn most vallen. En dan maar afwachten.

Na 1 uur was er nog niets te zien. Dat had ik ook niet verwacht.


Na 2 uren was er nog steeds niets te zien. Ook nu had ik eigenlijk ook nog niets verwacht. Er zouden immers pas 8 gistcellen in de most aanwezig zijn. En 8 gistcellen doen natuurlijk niets op een hele liter most.

Uiteraard bleef ik nieuwsgierig en ging ik elk uur even kijken of er al wat gebeurde.
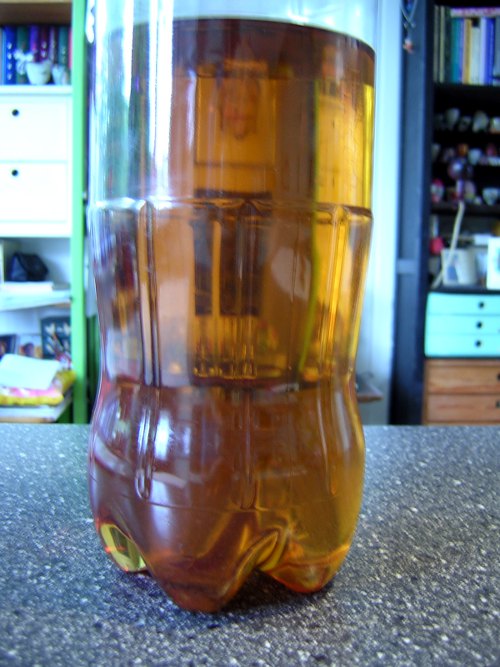

S'avonds om 10 uur was er nog geen enkele activiteit te zien en ging ik naar bed.

Dag 2

De volgende dag s'ochtends nog steeds geen activiteit. Weer ging ik elk uur kijken of er al wat gebeurde maar er gebeurde helemaal niets.

Ook s'avonds om 10 uur was er nog geen activiteit te bespeuren. Ik begon me nu een beetje zorgen te maken. Was het hele verhaal wel waar. Zou het overdreven zijn dat 1 gistcel een hele ton most aan het gisten zou kunnen krijgen.

Er waren nu immers 36 uren verlopen sinds ik die ene gistcel in de most liet vallen. En 36 uren is natuurlijk 72 halve uren. Dus er zouden nu 2^72 gistcellen (4.722.366.482.869.650.000.000) in de most aanwezig moeten zijn........

Dag 3


Het was nu zondag. Om 12 uur smiddags zag ik dat de most troebel was geworden. Een teken van aktiviteit.


Om 3 uur s'middags begon er zich een beetje schuim te vormen op de most.


S'avonds om 6 uur waren er al een paar meer schuimplekken.


En om 8 uur zag ik bubbels aan de rand van de fles opstijgen.

Dag 4


Maandagochtend om 7 uur stond er een flinke laag schuim op de fles.
Het experiment was gelukt !! Er was een flinke gisting gaande.

De volgende dagen.


De gisting was in volle gang maar begon na een paar dagen minder te worden.
In ieder geval was de gisting de eerste dagen zo heftig dat ik het appelsap makkelijk als giststarter had kunnen gebruiken.

Dag 11

Op dag 11 was het sap weer helemaal helder.

De most was uitgegist. Dat moest ik natuurlijk meten.


En inderdaad het SG stond onder de 1000. De most was uitgegist, de wijn was klaar.

Conclusie.

Ik kan natuurlijk nooit bewijzen dat de paar gistcellen die ik in het sap liet vallen inderdaad de gisting in werking hebben gezet. Ik werk immers niet onder laboratorium condities en kan mijn spullen niet steriliseren. Maar ik ben er zeker van dat het inderdaad mijn korreltje gist was dat het sap aan het gisten bracht.

Het is dus inderdaad mogelijk dat een of een paar gistcellen een compleet vat met most weer aan het gisten krijgt. In ieder geval heb ik laten zien dat een enkele nog levende gistcel kan zorgen voor een hergisting op de fles. En dat kan zorgen voor ontploffende flessen. Meet dus goed je SG en ga pas bottelen als het SG onder de 1000 staat. Of stabiliseer je wijn met sulfiet en kalium-sorbaat als er nog restsuikers aanwezig zijn.


Luc Volders Copyright 2012 


Geen deel van deze publicatie mag worden overgenomen in welke vorm dan ook (web-pagina's, forums of gedrukte tekst) zonder uitdrukkelijke schriftelijke toestemming van de auteur.


Sometimes you can read on winemaking forums the horror stories about bottles of wine that started refermenting and caused a real mess or even an explosion. Well there are two things needed for a refermentation: residual sugar and living yeastcels that can reform a yeast colony.

And sometimes a spontaneous fermentation starts in a must or juice. Well not really spontaneous. Air-borne yeast cells or a contaminated spoon or other winemaking aid can start a fermentation.


And as you will have read in my story about freezing must to stop fermentation, there are even yeast cells that survive freezing. But how many must survive to start a fermentation or to restart a fermentation in a bottled wine.

Now on winemaking forums for years the story goes that just one single yeast cell is needed to start a complete new colony and can have your wine refermenting. That is what I would like to research.

First I need to confess that I made things easy for the yeast. I made a juice with the best conditions for fermentation. I took 1 liter apple juice and added sugar till there was 200 gram sugar in the juice. I also added nutrients.

However to make sure that it was MY yeast that would start things and no bacteria or yeast present in the bottle or juice I boiled the juice and sterilised the bottle with sulphite. Then I waited till the bottle had cooled down and the juice was lukewarm.

Next I took my yeast and carefully took out 1 grain. Well what we can see it the bare eye as 1 grain are actually already a few grains. However as this is my kitchentavble laboratory and not a real laboratory I can not split it further anymore and therefore it has to do.

Now the theory tell that each yeast cell splits each half our. Maning that if you start with 1 yeast cel in half an hour there will be 2 and another half hour later there will be 4. Afther 1.5 hour there will be 8, afther 2 hour 16 etc etc etc. This process continues untill a certain saturation point has been reached. At that time fermentation continues but yeast cells will not reproduce anymore. Mind you it means that there are billions of yeast cells present in each cl at that time. 


Day 1


So on friday morning at 9 o'clock I dropped my grain of yeast in the must and the waiting started.

At 10 o'clock nothing happened. Well I actually did not expect at that time to see any activity.


After 2 hours still no activity. Again not surprising. According to the calculations there would just be 8 cells in the total must. And 8 cells in a liter will not make a lot noise. Off course I was curious and checked the must every hour.


In the evening at 10 o'clock there was still no activity visible and later on I went to bed.

Day 2

The next morning there was still no activity. Aagin each hour I checked the must but no sign of fermentation during the whole day. Even at 10 o çlock in the evening there was no sign of any activity. I started to worry a bit. Was the story a hoax ??? Was it just a fairy tale that one yeast cell could get a whole barrel going.

At this point 36 hour had passed since I dropped that 1 cel in the must. And 36 hour is 72 half hour. So the must should contain the incredible amount of 2^72 yeastcells (4722366482869650000000).......

Day 3


It was sunday. At 12 o'clock I saw that the must was cloudy. An obvious sign of activity.


At 3 o'clock some foam started to form.


In the evening at 6 o'clock more spots of foam where visisble.


And at 8 o'clock little bubbles where visible.

Day 4


Monday morning at 7 o'clock a layer of foam was clearly visible. The experiment succeeded !!! Fermentation was on its way.

The next days.


Every day there were visible (and audible) signs of fermentation just like you would see in any must. Afther a few days however fermentation was less vigorous and started decreasing.

The first few days however fermentation was vigorous and I could have used this must as a yeast starter for a new wine.

Day 11

On day 11 the juice was again perfectly clear.

The must had ceased fermentation and the wine should be ready. Only one way to make sure: measuring.


And indeed the SG was below 1000. The must had finished fermenting, the wine was ready.

Concluding.

I can never be sure that it was my one yeast cell that I dropped in started the fermentation in a few days. I do not have laboratory conditions at home and can not make my equipment sterile. But I am quite sure that it was my yeast cell that started it.

So we really can conclude that one or a very few yeast cells can start fermentation in a primary or carboy. At least I showed that a few cells can start a fermentation or re-fermentation in a bottle. And that can cause havoc or even exploding bottles.

So make sure you measure the SG and only start bottling when it is below 1000. Or stabilise your sweet wines with sulphite and sorbate.  


Luc Volders 

 Copyright 2012 No part of this publication and pictures may be reproduced in any form (printed text, web-pages, weblogs or forums) without written permission of the author.

zondag 23 september 2012

Bevroren gist / frozen yeast

Scroll down for the English version

Af en toe kom ik op een forum een post tegen van een wijnmaker die zijn wijn wil laten stoppen met gisten. Allerlei adviezen worden dan gegeven. Een van de adviezen is de wijn te koelen. Dat koelen kun je dan doen door de wijn een tijdje buiten te zetten (in de winter) of in de ijskast te plaatsen, en als hij dan helder is, over te hevelen. De wijn zal dan wel stoppen met gisten.

Ook is koude een manier die wordt aangeprezen om een uitgegiste wijn te klaren. Als de wijn een tijdje in de kou heeft gestaan dan zal de wijn wellicht klaren. Met het hevelen zul je de wijn dan van het sediment afhalen maar tevens ook de gistcellen achterlaten. De wijn is dan gestabiliseerd en klaar om gebotteld te worden.

Nieuwsgierig als ik ben ga ik dan aan de slag. Ik wil inderdaad weten of het afkoelen van een most, nee zelfs het bevriezen van de most de gisting zal stoppen. Eerlijk gezegd heb ik dat nooit geloofd. Maar de test zal het uitwijzen.

Ik ga dit op de eenvoudigst mogelijke manier testen.

Begin met het maken van een giststarter zoals beschreven in mijn weblog van augustus 2007 (klik hier).

Wacht daarna totdat deze starter flink aan het gisten is. Dat is meestal na 24 uur.

Om de fles in de vriezer te kunnen plaatsen moet er natuurlijk niet al te veel koolzuurgas ontwikkeling zijn. Je moet immers de dop op de fles kunnen draaien om hem in de vriezer te kunnen plaatsen.

Ik ging dus de fles goed schudden zodat het in de most opgeloste koolzuurgas vrij komt. Let op de most zal hierdoor flink gaan schuimen.
Na dit een flink tijdje hebben gedaan is het koolzuurgas wel weg uit de most en dan kan de starter in de ijskast. Volgens de meeste bronnen zal de aktiviteit van de gist hierdoor afnemen. Hierdoor zal de koolzuur ontwikkeling ook afnemen.

Na 24 uur kan de schroefdop dan op de fles, en de fles kan de vriezer in.

Na 3 dagen heb ik de fles met de bevroren starter uit de vriezer gehaald.

Maar we gaan het de gist niet makkelijk maken. We gaan hem echt tergen.


Nadat de starter ontdooid en opnieuw op kamertemperatuur is gekomen gaan we hem weer flink schudden. Dan gieten we de helft uit de fles. Ik ga ervan uit dat dan ook de helft van de dode en eventueel nog levende gistcellen wordt weggespoeld.
Dan vul ik de most aan met water waarin een beetje citroenzuur, suiker en gistvoeding is opgelost.

En raad eens wat ???
Na een uurtje staat de starter weer volop te gisten.

Eigenlijk zouden wij hierover niet verbaasd moeten zijn. In de natuur komen er natuurlijk ook strenge winters voor. En wilde gist zal deze winters ook overleven om in de zomer daarna weer aktief te worden.

Voor ons wijnmakers heeft dit nogal wat consequenties. Vaak wordt een wijn buiten in de koude gezet om te klaren. Na een tijdje zal de wijn inderdaad soms klaren en vormt er een laag sediment. Door de wijn dan van het sediment af te hevelen dacht de wijnmaker de wijn voldoende gestabiliseerd te hebben om te kunnen bottelen. Dat is dus echter niet waar.
Je kunt er niet zeker van zijn dat alle gistcellen inderdaad naar de bodem zijn gezakt. Er kunnen nog levende gistcellen in de most zweven. En de koude heeft deze cellen dan wellicht niet gedood waardoor een gisting opnieuw kan opstarten.

Nu heb ik deze test met een gezonde giststarter uitgevoerd. En het stabiliseren van wijn wordt meestal met een wijn gedaan die uitgegist is. Maar zelfs in een wijn die niet meer gist kunnen er nog levende gistcellen zijn. En net als ieder levend wezen hebben ook deze gistcellen sterk de drang om te overleven. En dus kunnen er een aantal gistcellen zijn die de koude overleven en de wijn opnieuw kunnen laten gisten.

Net zoals mijn experimenten met pecto-enzymen is dit ook weer een keukentafel experiment. Ook dit experiment zou met andere gisten een andere uitkomst kunnen geven. Het is daarom raadzaam voordat je gaat stabiliseren dit experiment zelf uit te voeren met de gist die je in je wijn hebt gebruikt.

Deze test toon echter ook nog iets anders aan.
Vaak vriezen we vers fruit in om zo een hogere sapopbrengst te krijgen. Dat is een prima methode. Maar het bevriezen van het fruit geeft dus geen garantie dat eventuele wilde gisten die op het fruit aanwezig zijn ook dood gaan.

Conclusie:

Het kouder plaatsen van most en zelfs het bevriezen ervan hoeft niet in te houden dat de gistcellen sterven. Een aktieve fermentatie op deze manier stoppen heeft dus geen zin. Een wijn die schijnbaar uitgegist is kun je op deze manier wellicht wel laten klaren, maar het geeft geen garantie dat de wijn daarna niet opnieuw kan gaan gisten.

Luc Volders

Copyright 2012
Geen deel van deze publicatie mag worden overgenomen
in welke vorm dan ook (web-pagina's, forums of gedrukte tekst)
zonder uitdrukkelijke schriftelijke toestemming van de
auteur.


On winemaking forums I sometimes see a posting of a winemaker that wants his wine to stop fermenting for various reasons. All kinds of advise is then offered. One of these advises is to cool the wine. Cooling can be done by putting the wine outside (during the winter months) or in the fridge. If the wine then clears you can rack it and it will stop fermenting.

Cold is also a method advised to clear the finished wine without the use of fining materials. If the wine is out in the cold for some time it probably will clear. By racking you will get the wine from the sediment and will also leave yeast cells behind. The wine should therefore be stabilised and ready for bottling.

Curious as I am I start to think if this is right. I want to know if cooling down a must, no even freezing a must will stop fermentation. To be frank I have always doubted that. But the test will prove if this is right.

I am going to test this the most easiest way.

First make a yeast starter as described in my web-log entry of august 2007 (click here).

Now wait till the starter is fermenting vigorously. This will take about 24 hour.

To put the bottle into the freezer we can not have to much CO2 devellopment. That is because we need to close the bottle to be able to put it into the freezer.

So I started by vigorously shaking the bottle so most of the dissolved CO2 will be set free. The must will foam significantly from this. After doing this for a while most CO2 will have dissapeared. Now we can place the starter in the fridge. Most sources mention that putting a starter or must in the fridge will stop yeast activity. Therfore CO2 devellopment will deminish.

After 24 hour we can screw the cap on and place the starter in the freezer.

Three days later I took the starter out of the freezer.

We are not going to make it easy for the yeast, no we are really going to make tough circumstances.


When the starter has thawed and reached room temperature we are going to shake it again vigorously so all ingredients (including yeast) will be thoroughly mixed. Next we pour half of the starter down the drain. I suppose that I will be sending half of the dead or alive yeast cells also down the drain.
I replace the lost must with water in which a bit citric acid, sugar and nutrients have been dissolved.

Now guess what ???
After about an hour the starter is fermenting again like nothing had happened.

We should not be surprised over this. In nature very cold winters happen. And during these fierce winters the wild yeasts will survive to become active again during next summer.

This has however some severe consequences for us winemakers. Sometimes a wine is put into the cold to clear. After a while the wine will sometimes indeed clear and a layer of sediment is formed. By racking the wine one thought that the wine was stabilied enough to bottle. This is simply not true.
You can not be sure that all yeast cells have dropped to the bottom. Some living cells may float in the wine. And the cold might not have killed these cells so a re-fermentation may occur.

Now I did this with a healthy yeast starter. And cold-stabilising is mostly done on a wine that stopped fermentation. But even in a stopped fermentation there might be some living yeast cells. And as each living being they might have a strong drive to survive. And therefore there could be some yeast cells that indeed survive the cold and restart fermentation.

Again this is kitchen table experimenting and the outcomes with the yeast you normally use might vary. Therefore it is good practice to do some test yourself.

One other thing that makes this test important.
This test proves that freezing fresh fruit might not kill any wild yeast that might be present on that fruit.

Concluding:


Putting must or wine in the cold and even freezing it does not guarantee that all yeast cells will be killed. Stopping an active fermentation this way is therefore unreliable. A wine that has finished may clear by putting it in the cold, but there is no guarantee that it stopped fermetation definately.

Luc Volders

Copyright 2012
No part of this publication and pictures may be reproduced
in any form (printed text, web-pages, weblogs or forums)
without written permission of the author.

donderdag 25 augustus 2011

Jam en pecto enzymen
Jam and pectic enzymes

Scroll down for the English version

In mijn vorige verhaal schreef ik dat ik bezig was met het wijnmaken van Jam.
Van Jam kun je lekkere wijn maken. Ik heb er ooit al eens een verhaal over geschreven. Ik gebruikte daarvoor aardbeien Jam. De wijn was ontzettend lekker en als er niet zo veel andere dingen voorbijkwamen had ik hem al lang opnieuw gemaakt.
En zoals je wellicht eerder op dit web-log hebt gelezen heb ik wel aarbeien jam gebruikt bij het maken van mijn paardenbloemen-aardbeien wijn.

Jam heeft een aantal voordelen. Het bestaat uit puur vruchten en suiker, de ingredienten die we voor wijnmaken nou net nodig hebben. Meestal zitten er geen conserveermiddelen in. Jam is lang houdbaar. En Jam is verkrijgbaar van de meest gangbare vruchten: aardbeien, pruimen, bramen, perzikken, kersen, rozenbottels, frambozen etc. etc. etc. Jam is het hele jaar door verkrijgbaar en vaak spotgoedkoop.

De volgende keer laat ik jullie zien hoe je frambozenwijn maakt van Jam, maar daar gaat deze aflevering niet over. Deze aflevering gaat over een specifiek aspect van het maken van wijn van Jam.

Jam heeft veel pectine.

Jam is een dikke stof. Dat moet ook wel want de vruchten moeten smeerbaar zijn op onze boterham.
De dikte wordt, onder andere, veroorzaakt door de pectine. Door het verhitten van vruchten samen met suiker vormt de pectine een gelei.
En dat is nou net wat we bij het wijnmaken willen voorkomen. Daarom voegen we altijd pecto enzymen toe. Deze breken de pectine af.

Als we op internet gaan zoeken dan komen we veel artikelen tegen over het gebruik van pecto enzymen. Slechts weinig artikelen vertellen waar de enzymen vandaan komen.
Een paar artikelen melden dat pecto enzymen in de pitten van citrus vruchten worden gevonden.
Wikipedia geeft echter aan dat pectinase (pecto enzymen) in commercieel gebruik worden gewonnen uit de schimmel:Aspergillus niger. (bron Wikipedia: http://nl.wikipedia.org/wiki/Pectinase).
Ook het Amerikaanse Scott-Labs dat de enzymen van het Franse Laffort vertegenwoordigd geeft deze schimmel als productiebron aan.

Van vast naar vloeibaar.

Wijn kun je van sap maken. Maar Jam bevat geen sap. Dus kun je van Jam geen wijn maken dan ???
Natuurlijk wel. Je moet alleen de cel-structuur van de vruchten kapotmaken en de pectine afbreken. Dat doen we dus met pecto enzymen.

Het gebruik van pecto enzymen heb ik ooit al eens beschreven in twee artikelen op dit web-log. In het eerste artikel liet ik zien wat de enzymen doen met appelmoes.

Dat artikel wordt achterhaald met dit verhaal. Dit verhaal laat het gebruik van de enzymen veel beter zien.

Het andere artikel beschrijft onder welke omstandigheden de enzymen wel en niet zullen werken. Dat artikel blijft heel waardevol en ik raad jullie dan ook aan dat goed te bestuderen. Dan kan door hier te klikken.

Tijdens een discussie op een Amerikaans wijnmakers forum betwistte een van de wijnmakers echter mijn stelling dat Jam vloeibaar gemaakt kan worden door het gebruik van pecto enzymen. Ik ga je hier laten zien dat ik gelijk had. Dit was mijn eer te na !!!

Dit is natuurlijk weer een keuken-tafel experiment en geen laboratorium-onderzoek. Ik heb dit experiment in een weekeinde gedaan met de enzymen die ik voorradig had. Als je het experiment wil herhalen dan kun je dus een andere uitkomst krijgen, maar ik verwacht dat niet.


Ik kocht twee potten Jam. Elk een andere vruchtenjam en elk van een andere fabrikant.
De kersenjam kwam van de Aldi en de aardbeienjam van Albert Hein.


Uit beide potten nam ik een eetlepel jam en deed die samen op een bord.


Je kunt op de foto's zien wat een vaste substantie de Jam heeft.


Nu had ik wat ruimte in de potten en deed in elke pot 1 theelepel pecto enzymen.

De potten werden dichtgeschroefd en op een warme plaats naast elkaar gezet. Ik liet ze 24 uur staan maar schudde de potten elke keer als ik er langsliep. Dat zal ongeveer 5 keer zijn geweest.

De volgende dag werden de potten weer op de tafel gezet en nam ik het bord er weer bij.


Eerst schroefde ik de dop van de kersenjam. Deze was inderdaad vloeibaar geworden en ik kon hem zo op het bord gieten. Je zou het sap zo over je ijs kunnen gieten of als dikke vruchten drank kunnen drinken.


Daarna nam ik de aarbeienjam. Deze was iets dikker maar nog steeds vloeibaar genoeg om zo op het bord te gieten. Ook dit sap was uitermate geschikt als ijs-garnering of om wijn van te maken natuurlijk.......

Ik zet de foto's van de jam en het eindresultaat hier nog eens onder elkaar:


Kersen


Aardbeien.

Conclusie.

Door Jam met pecto enzymen te bewerken kun je de Jam vloeibaar maken en dus geschikt om er wijn van te maken. Als de Jam eenmaal vloeibaar is zullen de gistcellen er makkelijk toegang tot krijgen en nog verder kunnen afbreken.

Dosering.
Om Jam voor wijn te kunnen gebruiken raad ik aan 1 theelepel pecto enzymen per pot jam van maximaal 500 gram te gebruiken. Wellicht werkt een halve theelepel per pot ook, maar dat is een ander experiment.

Links in dit arikel:
- Wikipedia over pectinase
- Het belang van pecto enzymen (mijn 1e verhaal)
- Avonturen op het pecto-pad (onder welke omstandigheden werken de enzymen)
- Paardenbloemen-aardbeienwijn
- Scottlabs enzymen
- Aardbeien-Paardenbloemenwijn

Luc Volders

Copyright 2011
Geen deel van deze publicatie mag worden overgenomen
in welke vorm dan ook (web-pagina's, forums of gedrukte tekst)
zonder uitdrukkelijke schriftelijke toestemming van de
auteur.


In my previous entry I wrote that I was making wie from raspberry jam. And it is indeed possible to make a splendid wine from Jam. I once wrote a story on this in which I used strawberry jam. The wine was excellent and if there were not such a lot of things that came along I would have made it again by now. It still is high on my agenda.
However as you know by now I did use strawberry jam in my dandelion strawberry wine.

Using Jam has some distinct advantages. It consists of pure fruit and sugar, just what we need for winemaking. Generally there are no conservatives in it. Jam can be stored for a long time. And Jam is available from a great variety of fruit: strawberry, raspberry, plums, blackberry, cherry, peach, rosehips etc etc etc. And Jam is available almost throughout the whole year and often very cheap.

Next time I am going to show you how to make wine from Raspberryjam, but that is not what this article is about. This article is about a specific part of winemaking from Jam.

Jam contains a lot of pectin.

Jam has a thick consistancy. It has to have as it is meant to be spread on our sandwhiches..
The thickness is, amongst other things, caused by pectin.
By heating fruit together with sugar the pectin forms a jelly. And that is just what we as winemakers try to prevent. That is why we add pectic enzymes. They break down the pectin.

When searching the internet you can find a whole lot of articles about the use of pectic enzymes. Just a few tell us were they origine from.
A few articles mention that pectic enzymes are found in the pits of citrus fruit.
Wikipedia however mentions that pectinase (pectic enzymes) are commercially produced by using the fungus Aspergillus Niger (source: http://en.wikipedia.org/wiki/Pectinase). This is also stated by Scottlabs that represents the French producer Laffort.

From solid to fluid.

So wine can be made from juice. Jam however is no juice. So can't you make wine from Jam ???
Off course you can. You just need to break down the cell structure and pectine. And that is what we do with pectic enzymes.

Some time ago I already described the use of pectic enzyme on this web-log. In the first article I described what the enzymes did to apple-juice.
That article is overpowered by this one. This article will show you the use of enzymes much more clearly.

The other article described what the circumstances were under which the enzymes will function and in which case they don't. That article is still very valuable and can be found here.

Now during a discussion on an American forum one of the winemakers attacted my statement that jam could be made fluid just by using pectic enzymes. I am going to show you here that I was right and he was wrong. My honor was at stake here !!!!

This is off course a kitchen table experiment and no laboratory investigation. I did this experiment during a weekend with the pectic enzyme I had available. If you want to repaet this experiment you might get another result although I doubt that.


I bought two jars of Jam. Each fruit jam and each from another manufacturer.
The cherryjam was from Aldi's and the strawberryJam from our national Grocer: Albert Heijn.


Out of both jars I took a tablespoon of Jam and put it on a plate.


The pictues will show you how thick a substance the Jam is.


Now I had some space in the jars and in each I put a tablespoon pectic enzyme.

Both jars were closed with their original lids and put side by side in my livingroom. The temperature was in the twenties (degrees celsius). I waited 24 hour nut everytime I passed the jars I shaked them. That must have happened around 5 times.

Next day the jars and plate were put on the table for testing.


First I took the lid from the cherry-jam. This had become fluid indeed. I could pour it effortlessly on the plate. You could use it as juice for icecream dressing or drink it as a fruit juice. And that is just what we did.


Next I opened the jar with the strawberryjam. This was a bit thicker yet still fluid enough to pour on the plate. This juice was indeed also usable as icecream topping or for making wine off course.....

I will give you the photo's of the end-product here again:


Cherry


Strawberry

Concluding:

By letting the pectic enzymes do their job it is indeed possible to make jam fluid and suitable for winemaking.
When the jam has become fluid the yeast will have easy access to it and will break it down even further.

What amount of pectic-enzyme to add.
To use Jam in winemaking I advise to add 1 teaspoon pro jar of Jam of maximum 500 gram. Maybe a half teaspoon will work but that was beyong the scope of this experiment.


Links in this article:
- Wikipedia about pectinase
- The importance of pectic enzymes (my first story on this subject)
- Further adventures on the pectic-path
- Strawberry-Dandelion wine
- Scottlabs enzymen

Luc Volders

Copyright 2011
No part of this publication and pictures may be reproduced
in any form (printed text, web-pages, weblogs or forums)
without written permission of the author.

vrijdag 15 april 2011

Pulpgisten deel 7 / Pulpfermenting part 7

Scroll down for the English version

Dit is dan het zevende en laatste deel in de serie over pulpfermenteren. De eerste twee delen bespraken de theorie die de achterliggende gedachte vormt.
De volgende delen bracht deze theorie in praktijk en onderzocht wat er in de praktijk van terechtkwam.
Onderaan deze pagina vindt je een lijst met links naar de voorgaande delen in deze serie.

Dit deel geeft de eindanalyse en conclusies.

Even resumerend:
Bij pulpgisting laten we de vruchtenpulp in het sap zitten om zo meer kleurstoffen, smaakstoffen, tannine en suikers in het sap op te lossen.

De resultaten.

In de afgelopen afleveringen hebben we 4 soorten vruchten verwerkt: Appels, pruimen, vlierbessen en bramen.

Het fruit werd in gelijke delen verdeeld over 3 glazen potten.
De eerste dag deed ik bij twee van de potten (Pot B en Pot C) pecto enzymen. Een pot (pot A) kreeg geen toevoeging. Hierdoor kun je zien wat de invloed van de enzymen op het sap zijn.

De tweede dag werd er aan pot C (waar dus ook pecto enzymen in zaten) gist toegevoegd. Hierdoor kun je mooi zien wat voor extra invloed de gisting op het sap heeft.

Bij elk van deze vruchten zagen we dat het SG gedurende de eerste 3 dagen steeg en daarna min of meer constant bleef.

Ook de zuurgraad steeg de eerste drie dagen en bleef daarna constant.

Grafieken.

Ik geef je hier de grafieken die de SG en zuur ontwikkeling in pot B per fruitsoort weergeven.


Deze grafieken tonen je duidelijk de stijging van de zuurgraad en het SG na een paar dagen.

Ik neem bewust pot B voor deze grafieken, omdat het SG in pot C daalde door de gisting en dus geen duidelijk beeld geeft.

Kunnen we daar een conclusie aan verbinden ???

Wel je mag hieruit concluderen dat pulpvergisting op zichzelf geen grote invloed heeft op de stijging van het SG en de zuurgraad van de most.

De stijging van het SG en de zuurgraad worden voornamelijk veroorzaakt door de werking van de pecto enzymen.

Vervolgens zien we dat kleurstoffen, suikers en zuren gedurende de eerste 3 dagen opgelost worden in de most. Langer pulpvergisten is voor deze stoffen niet nodig.

Er zijn echter stoffen (zoals tannine) die alleen in alcohol oplossen. Als je meer tannine in je wijn wil (bij die vruchten die tannine bevatten) dan is het raadzaam om wat langer te laten pulpgisten. Het alcohol niveau zal immers stijgen naarmate de tijd verstrijkt.

Maar voor vruchten die heel veel tannine bevatten, zoals vlierbessen, is drie tot vier dagen pulpgisten meer dan genoeg.

Belangrijk !!!!

Allemaal mooi die droge theorie en experimentjes, maar wat hebben we eraan. Ben ik gewoon een paar weken leuk bezig geweest met metingen te doen, naar dingen die we al lang weten.

Nee er kwam namenlijk een heel belangrijk aspect naar boven in deze verhalenserie.

Heb je wel eens een wijn gemaakt die toen hij klaar was te zuur was, of te veel alcohol had. Of een combinatie van beide. En dat terwijl je metingen wel klopten ???

Als je deze serie goed gelezen hebt dan weet je dus waar dit door komt.

Als we wijn maken dan pulpen we de vruchten en nemen direct een monster. Dat monster gebruiken we om de metingen te doen om te onderzoeken wat onze most verder nodig heeft om er een goede wijn van te maken.
Fout dus !!! Absoluut fout !!!!

Stel je pulpt je appels en meet het sap. In mijn voorbeeld had het sap een SG van 1050. Je voegt suiker toe om een wijn van bijvoorbeeld 11% te krijgen.

Maar na 1 dag pulpgisten is het SG van het sap zelf van 1050 naar 1060 gestegen. Dat is genoeg om 1,5% alcohol extra te maken.

Met andere woorden, je komt dan niet op 11% alcohol uit maar door het pulpgisten eindig je op 12,5%.

Voor de zuurgraad geldt hetzelfde. Die steeg in het voorbeeld van de applels in twee dagen zelfs van 10 naar 13.
Dat is een stijging van 30% in twee dagen. Als je aandelen dat zouden doen was je in no time multimilionair.
Maar als wijnmaker, als je je most had aangepast aan de metingen die je de eerste dag had gedaan, dan was je wijn dus veel te zuur geworden.

Fruit uit blik !!!

Dit heeft niet alleen betrekking op vers fruit, maar ook op fruit uit blik en bijvoorbeeld jam.

Zoals jullie in de vorige afleveringen zagen zal het fruit dat in zijn eigen sap zit te weken geen stijging van zuur en SG te zien geven.
Pas als er pecto enzymen bij zijn gekomen zullen deze waarden stijgen.

Als je wijn maakt van fruit uit blik moet je daar dus bij opletten.

Het fruit zit dan al een paar maanden/weken in zijn eigen sap te weken. Maar dat doet dus niets.

Als we wijn gaan maken, dan voegen we er pecto enzymen bij, en dan kan de zuurgraad en het SG dus opeens gaan stijgen !!!

Wat moet je dus doen ??

Vanaf nu gaan we dus bij het maken van vruchtenwijn van vers fruit, of fruit uit blik, als volgt te werk.

We beginnen met ons fruit te pulpen. Dan gaat het in een grote ton die we op kamertemperatuur wegzetten. We voegen daar pecto enzymen aan toe. Gebruik liever te veel als te weinig pecto enzymen. Drie keer de hoeveelheid die op de verpakking staat, of gewoon een paar flinke theelepels vol. Een teveel aan pecto enzymen doet je wijn geen kwaad.

De volgende dag, en liefst nog een dag later, doen we de suiker en zuur metingen, en daar passen we ons recept, suiker en zuurtoevoegingen, op aan.

We doen de metingen dus pas de tweede of derde dag. En daar passen we het recept op af.

Op die manier zijn we verzekerd van een goed resultaat.

Conclusie

Pulpvergisten heeft wel degelijk zin.

Het zorgt ervoor dat er meer suikers en zuren in het sap oplossen. Ook zie je bij rode vruchten duidelijk de kleur van het sap voller en donkerder worden.

Omdat het oplossen van de extra suikers en zuren uit de pulp een paar dagen nodig heeft moet je de metingen aan je sap pas op de tweede of derde dag doen.

Verwijzingen in dit verhaal:

- Pulpgisten deel 1 de theorie
- Pulpgisten deel 2 vragen van lezers
- Pulpgisten deel 3 appels
- Pulpgisten deel 4 pruimen
- Pulpgisten deel 5 vlierbessen
- Pulpgisten deel 6 bramen


Luc Volders

Copyright 2011
Geen deel van deze publicatie mag worden overgenomen
in welke vorm dan ook (web-pagina's, forums of gedrukte tekst)
zonder uitdrukkelijke schriftelijke toestemming van de
auteur.


This is the seventh and last part in my series about pulpfermenting. The first two parts described the theory. The next parts showed you some real-life results. At the end of this page you will find links to these stories.

This part gives you my end-analyses and conclusions.

Resuming:
When pulpfermenting we mash the fruit and , depending on the kind of fruit, fruitskin and let this pulp soak in the natural juices of the fruit. EWe try to achieve that way that more colour, flavor, SG and acids dissolve in the juice.

The results.

In the previous parts of this story we tested 4 kinds of fruit: apples, plums, elderberries and blackberries.

The fruit was equally devided over three jars.
The first day pectic enzymes were added to two of the jars (Jar B and Jar C). Jar A did not get any additions. This would show me what the influence of pectic enzymes would be.

The second day yeast was added to jar C (one of the jars that also contained pectic enzymes). This should show the extra influence of yeast on the must.

Each of the fruits showed that the SG rose in the first three days and then remained the same.

The same was experienced for acidity. Acidity would rise the first three days and then stuck at that level.

Graphs.

I will show you here the graphs that represent SG and acidity per fruit variety.


The graphs clearly show the rise of SG and acidity during the first three days.

I took each time the data of jar B. In jar A there was almost never any activity and jar C would give misinterpretations due to fermentation.

Can we make any conclusions from this ???

Well first you may conclude that the fermentation itself has almost no influence on SG or acidity.
The rise in SG and acidity is caused by the pectic enzymes.

Next you can see that colour, sugar and acid extraction mostly take place during the first three days. For these longer pulpfermentation is not needed.

There are however ingredients (like tannin) which only dissolve in alcohol. So if you need more tannin in your wine (when using fruit that contains tannin) it is advisable to pulpferment a few days longer as alcohol level will rise during a later stage.

However it is advisable for fruit that contains a lot of tannin, like elderberries, to pulpferment no longer as 3 to 4 days.

Important information !!!!!

Great all that dry theory and cosy experiments, but what did they bring us. Was I just nicely occupied for a few weeks doing measurements about things that were already clear ???

No not at all !!!
Avery important aspect in winemaking emerged from these experiments.

Did you ever make a wine that was too acidic or had too much alcohol. Or had a combination of both so it tasted like rocket-fuel. And that despite the fact that your measurements were accurate ???

Well, if you read this series thoroughly you will know what caused this.

When we make a wine from fresh fruit, we pulp the fruit and take a sample. We use that sample to do measurements regarding SG and acidity. Then we adjust our must according to these measurements to get a fine wine.
Wrong !!! Absolutely wrong !!!

Suppose you make an apple-wine. You mash the apples and measure the juice. In my example the juice had an acidity of 1050. Now you take this figure to calculate how much sugar you will need to add to get a wine of 11%.

Yet already after 1 single day of pulpfermenting (actually soaking with pectic enzyme) the SG will have risen from 1050 to 1060. That will give 1.5% alcohol extra !!!

So your final result will not be a wine with 11% alcohol but will have 12.5%

Same goes for acidity. With my apple example it actually rose from 10 to 13.
That is a rise of 30% in just two days. If my stock of shares would perform that way I would be a billionaire.
However at winemaking you will have a problem. If you adjusted your must to the measurements you did the first day you would have a far to acidic wine.

The combination of the rise in unforseen alcohol and acidity would have made rocket fuel.

Canned fruit !!!

This not only has an impact on fresh fruit but also on canned fruit and jam.

As you have seen in the previous parts in this storyline, a fruit that is soaked in its own juice will not see a significant rise in SG and acidity.
Only when pectic enzymes are introduced these values will rise.

So think about this when making wine from canned fruit.

The fruit will have been soaking in its own juice for months or weeks. However that will have no influence.

When making wine from this canned fruit we will introduce pectic enzyme and then SG ans acidity can suddenly rise !!!!

How to act.

From now on we will follow the right procedure when making wine from fresh fruit pulp, or canned fruit.

First we mash the fruit. We pour the mash in a large primary which is stored at room temperature. An adequate amount of pectic enzymes is added to this pulp. Remember: add preferably more pectic enzymes as the amount the packaging prescribes. Don't be shy on them, excess will not harm your wine.

Next day, or preferably even a day later, we measure SG and acidity, and adjust our must accordingly.

So summarising: do the measurements on the second of third day in the winemaking process and adjust the recipe according to these measurements.

That way we are assured of good results.

Concluding.

Pulpfermenting has a clear purpose.

It makes sure that more sugar and acid is dissolved in the juice. When soaking red fruit the juice will get darker and fuller.

Because dissolving the extra sugars and acid from the pulp in the must will take a few days, you will need to do the measurements on the second of third day and adjust the must according to these measurements.

Links in this story:

- Pulpfermenting part 1 Theory
- Pulpfermenting part 2 Readers Questions
- Pulpfermenting part 3 Apples
- Pulpfermenting part 4 Plums
- Pulpfermenting part 5 Elderberries
- Pulpfermenting part 6 Blackberries

Luc Volders

Copyright 2011
No part of this publication and pictures may be reproduced
in any form (printed text, web-pages, weblogs or forums)
without written permission of the author.